Blog

  • Best Disney World Resorts for Autism Families

    Best Disney World Resorts for Autism Families

    The right hotel can make a Disney trip feel manageable instead of exhausting. For families looking for the best Disney World autism resorts, the ideal choice is not always the room closest to a park or the property with the biggest pool.

    A quiet room, reliable transportation, extra space to reset, and a predictable food plan often matter more. Your resort should provide a dedicated space to decompress, helping to mitigate sensory overload for neurodivergent guests after a busy day at the parks.

    The goal is not to find one perfect Disney resort. The goal is to find the accommodation that supports your family’s routines, sensory needs, budget, and park plans.

    Key Takeaways

    • Choosing where to stay involves evaluating Disney World transportation options, room layouts, and noise levels, as these factors significantly impact your vacation experience. This guide explores a range of options, from quiet resorts that provide a peaceful retreat to specific moderate resorts that may offer a better sensory environment.
    • Disney’s Port Orleans Resort, French Quarter is often a top recommendation for families seeking a smaller, more intimate setting among moderate resorts.
    • Art of Animation is highly helpful for families who need extra sleeping space, but its bold, immersive theming and bustling common areas are not the right fit for every child.
    • While deluxe resorts can help minimize travel time to the parks, their reliance on monorails, boats, and busy lobbies may introduce unexpected sensory challenges.
    • Securing a quiet room location, maintaining a consistent daily routine, and ensuring access to familiar food can be just as important to a successful trip as your choice of resort category.

    What Autism Families Should Consider Before Choosing a Resort

    Disney World resort planning is about more than picking a theme or looking at a pool photo. A resort that feels fun during a quick online search may feel overwhelming after a long park day.

    Start with your child’s normal routine at home. Do they need quiet before bed? Do they wake up early? Do they need space to move around when they are upset? Do they eat a small group of familiar foods? These answers should guide your hotel choice to better accommodate sensory sensitivities and help your child avoid overstimulation while on vacation.

    Transportation is also a major part of the decision. Disney World transportation can be a source of stress or convenience; buses can be crowded and unpredictable at peak times, while the Skyliner may be exciting for one child and stressful for another. Monorails are convenient, but they can be loud and busy, especially after fireworks.

    Think about the distance between your room and the things you will use most. A room near the lobby, bus stop, food court, or pool can make mornings easier. A room farther from those areas may be quieter. There is no wrong answer. It depends on whether your family needs less walking or less activity outside the door.

    The best Disney resort for an autism family is often the one that makes recovery time easier.

    Room size matters too. Standard Disney rooms can feel tight when everyone needs a break at the same time. A family suite, villa, or cabin gives people more space to spread out. That can mean one person watches a familiar show while another rests in a quieter room.

    Before booking, review the official Disney World resort hotel options and look beyond the resort photos. Pay attention to transportation, dining, room layouts, and how large the property is. As you evaluate these options, remember that planning scheduled breaks back at the resort is an effective way for your family to regroup and maintain a successful pace throughout your stay.

    A Quick Look at Disney World Autism Resorts

    When planning a vacation for neurodivergent guests, choosing the right accommodation is essential. Each property offers unique advantages, and comparing various value resorts, moderate options, and deluxe resorts can help you determine the best environment for your family. This comparison table highlights key factors to help you narrow your choices.

    ResortBest ForTransportationThings to Consider
    Disney’s Port Orleans Resort, French QuarterFamilies who want a smaller, quieter feelBus, boat to Disney SpringsOnly bus service to parks
    Disney Art of Animation ResortFamilies needing a suite and separate sleep areasSkyliner, busBright theming and busy common areas
    Disney’s Pop Century ResortFamilies wanting value and Skyliner accessSkyliner, busCompact rooms and active shared spaces
    Disney’s Wilderness LodgeFamilies who prefer a calmer deluxe settingBoat to Magic Kingdom, busHigher price and large central lobby
    Disney’s Animal Kingdom LodgeFamilies who enjoy animal viewing and hotel timeBusLonger rides to most parks
    Disney’s Old Key West ResortFamilies who need space and a slower paceBus, boat to Disney SpringsLarge property with internal bus stops
    Disney’s Contemporary ResortFamilies focused on Magic Kingdom accessWalkway, monorail, busMonorail noise and a busy central area

    The best fit is rarely about the resort with the most features. It is about the features your family will actually use to ensure a comfortable stay.

    Disney’s Port Orleans Resort, French Quarter: A Calmer Moderate Resort

    Disney’s Port Orleans Resort, French Quarter is often one of the first locations I consider when families are looking for the best moderate resorts at Disney World. Because it is smaller than many other properties on the map, the footprint alone can reduce a significant amount of daily stress.

    The walk from most rooms to the lobby, food court, bus stop, and pool is usually manageable. You are less likely to feel like you are crossing a huge resort just to get breakfast or refill a water bottle.

    The New Orleans style buildings have a gentler look than some of Disney’s brighter value resorts. The atmosphere feels more relaxed, especially in the morning and later in the evening. There is still Disney music, activity, and pool noise, but the resort does not feel as visually busy as Art of Animation or Pop Century.

    French Quarter also features a boat to Disney Springs. This offers a quieter form of Disney World transportation that can help prevent sensory overload compared to the hustle of a bus or monorail. While Disney Springs can get crowded, and may not always provide a total break, the boat ride itself is a peaceful way to enjoy an evening meal, a quick shopping trip, or other low-key activities.

    The main drawback is that buses are the only transportation option to the four Disney parks. If waiting at a bus stop is difficult for your child, build in extra time and avoid leaving right after a nighttime spectacular whenever possible.

    For many families, though, the smaller layout is worth it. French Quarter serves as an excellent middle ground between a value resort and a deluxe resort.

    Art of Animation and Pop Century: Helpful for Skyliner Families

    The Disney Skyliner has fundamentally changed how many families plan their theme park visits. It provides convenient access from both Disney Art of Animation Resort and Disney Pop Century Resort to EPCOT and Disney Hollywood Studios. As two of the most popular value resorts on property, these locations offer unique benefits for guests who prioritize transportation efficiency.

    For many autistic guests, the Skyliner is a preferred alternative to the crowded and noisy bus system. It provides a consistent view of the surroundings, follows a clear and predictable route, and often feels less claustrophobic. However, for other individuals, the sensation of movement, the height, wind, or the possibility of an occasional pause may be uncomfortable. It is worth discussing these sensory factors with your family before your trip.

    Why Art of Animation Can Be a Strong Choice

    Disney Art of Animation Resort is particularly helpful for larger families who require extra space. The family suites in the Cars, Finding Nemo, and Lion King areas offer a separate bedroom, additional sleeping areas, a kitchenette, and two full bathrooms.

    Having two bathrooms can make a busy Disney morning significantly less stressful. Furthermore, the kitchenette is a valuable asset for managing sensory sensitivities related to food. Having the ability to prepare familiar breakfasts, store preferred snacks, and keep specialized drinks or medications on hand can provide a crucial sense of consistency.

    The Cars section is often appealing for families who want a slightly less intense visual environment than the main Finding Nemo courtyard. While room requests are not guaranteed, mentioning your preferences early can help. Keep in mind that Art of Animation features bold colors, large character figures, and active pathways. While some children will thrive in that high-energy environment, others may need to retreat to the suite as a dedicated quiet space to reset.

    When Pop Century Makes More Sense

    Pop Century offers the same Skyliner convenience as its neighbor but is generally more affordable, making it a budget-friendly option for families who want efficiency without the cost of a suite.

    These rooms are smaller than the suites at Art of Animation, which is an important consideration. If your child requires a quiet place to retreat from siblings or the general hustle, a standard room may feel a bit tight after several days of travel. Because of this, Pop Century is often the better choice for neurodivergent guests who prefer a streamlined, efficient home base rather than a larger living space.

    Pop Century features large icons, upbeat music, and a bustling food court. Choose this resort if your family enjoys being in the middle of the activity, values quick access to Hollywood Studios and EPCOT, and intends to spend most of their time exploring the parks. If your primary goal is finding maximum quiet, extra square footage, and a slower pace, you may find that French Quarter, Old Key West, or a Disney Vacation Club villa is a better fit.

    Wilderness Lodge, Animal Kingdom Lodge, and Old Key West

    Some of the best Disney World autism resorts are not the ones people talk about first. These three deluxe resorts offer a different pace, providing more room to breathe between busy park days.

    Disney’s Wilderness Lodge

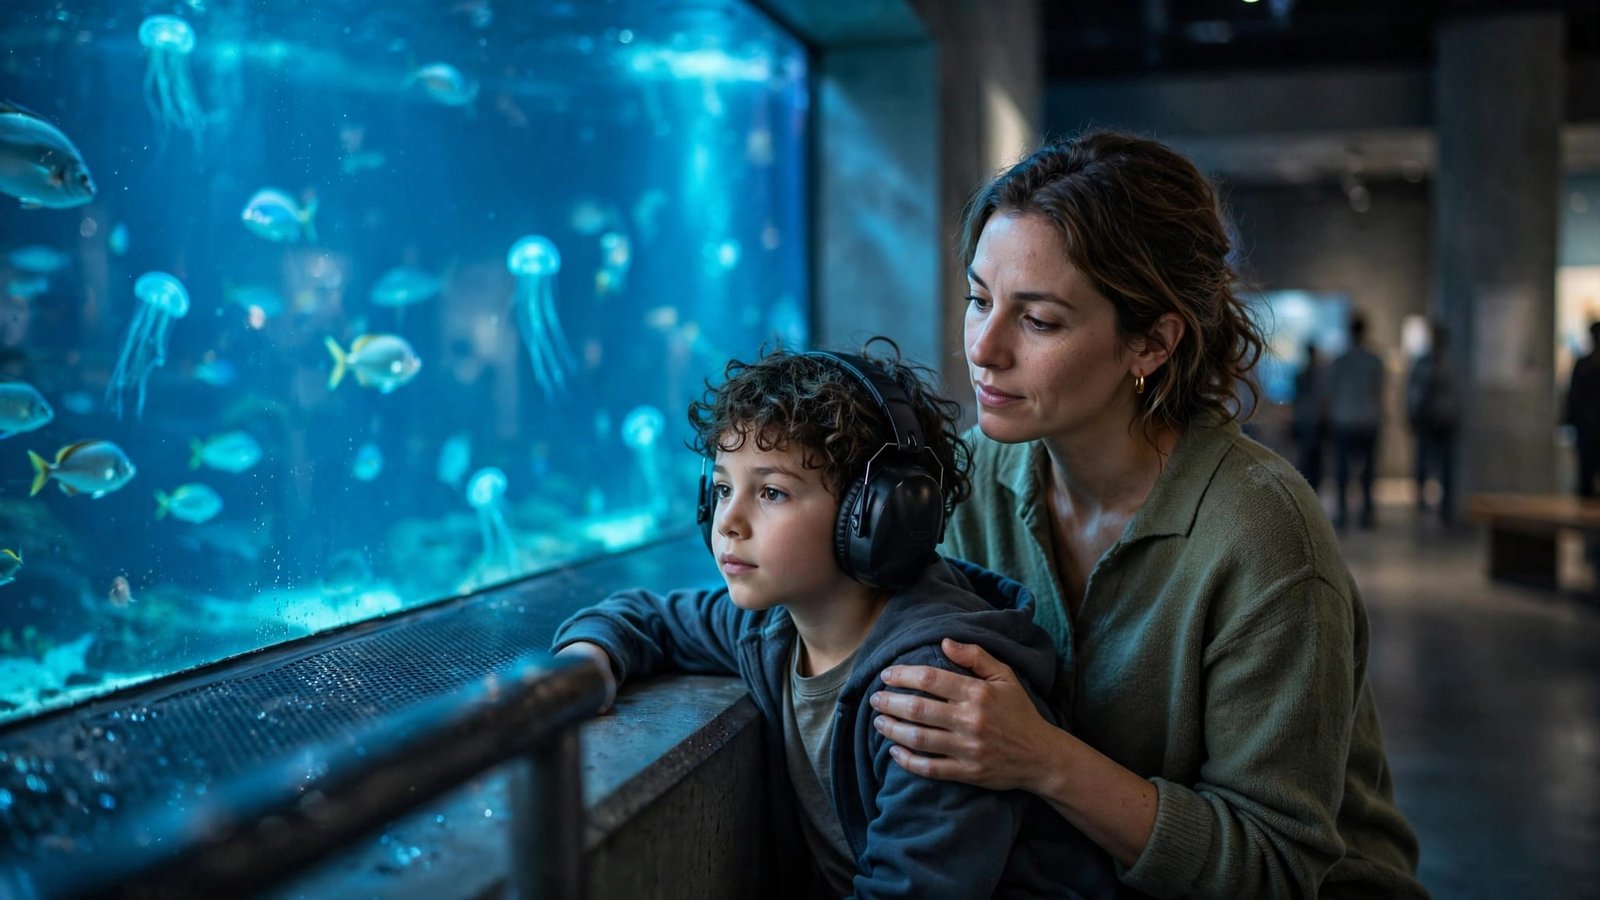
    Wilderness Lodge features a dramatic lobby, a boat to Magic Kingdom, and a more contained layout than many other hotels. The lobby can be busy at check-in and during evening hours, so consider using noise-reducing headphones if the environment becomes too loud for sensitive guests. The guest room wings and outdoor areas generally feel much calmer.

    The boat ride to Magic Kingdom is a major benefit. It avoids the transportation and ticket center process required by some other resorts. After a long day at the park, getting back on a boat can feel easier than standing in a crowded bus line.

    This resort works well for families who want deluxe convenience but do not need the constant activity of the monorail resorts. Ask for a room away from the main lobby, elevators, or high-traffic areas if noise is a concern.

    Disney’s Animal Kingdom Lodge

    Animal Kingdom Lodge is a great choice for families who want the resort to be an active part of their vacation. Viewing animals from the resort grounds or a savanna-view room can create calm, low-pressure moments without needing an additional park ticket.

    The lodge has beautiful shared spaces, but its main lobby can have voices, music, and activity. The rooms and outdoor animal viewing areas may be the better reset areas for sensory-sensitive guests.

    The challenge is transportation. Buses are the main way to reach the parks, and Animal Kingdom Lodge is farther from Magic Kingdom and EPCOT than many other Disney resorts. This is not always a problem, but it does require realistic planning.

    If your family likes returning to the hotel in the afternoon, the longer bus ride may feel like too much. If you plan slower park days and value downtime, Animal Kingdom Lodge can be a wonderful fit.

    Disney’s Old Key West Resort

    Old Key West is often overlooked, but it can be one of the most comfortable choices for autism families. The rooms are larger than many standard Disney rooms, especially in villa categories. The resort has a relaxed, residential feel with lots of open space.

    Families who need a kitchen, laundry access, and separate sleeping areas may appreciate a one-bedroom or two-bedroom villa. These larger floor plans are ideal for families who need scheduled breaks to regroup in a private setting. Being able to prepare familiar meals can also remove a lot of pressure from a Disney trip.

    The trade-off is the large layout. Some room locations are far from the main lobby and Hospitality House. Internal bus stops are available, but that is another transportation step to consider.

    Old Key West is a strong option for longer stays, multi-generational trips, and families who plan rest days. It gives you more space to regroup without leaving Disney property.

    Resorts That Need a More Careful Match

    There is nothing wrong with Disney’s Caribbean Beach Resort, Disney’s Coronado Springs Resort, or the monorail resorts. They can work well for many families. They simply need a closer look before booking to ensure they fit your specific needs.

    Caribbean Beach has Skyliner access, a fun pool area, and a central location. It is also a large resort with several villages. A room far from the main hub can mean long walks. The main Skyliner station and food court area can get busy, especially in the morning.

    Coronado Springs has attractive rooms, dining choices, and a more adult feel. It also hosts conventions. That can mean large groups, activity in common areas, and more people moving around the resort. The property is spread out, and bus transportation is the main park option.

    Disney’s Contemporary Resort gives you the convenience of walking to Magic Kingdom. That is a huge plus for families with young children or guests who struggle with bus transportation. Still, the monorail runs through the building, and the central area can feel loud and open.

    Disney’s Polynesian Village Resort has great transportation options, but it is popular and often busy. Music, foot traffic, dining guests, and crowds around fireworks can make the main areas feel intense. Disney’s Grand Floridian Resort & Spa has a more formal feel and access to the monorail, but it can also have activity in its main building.

    Disney’s BoardWalk Inn, Yacht Club Resort, and Beach Club Resort offer easy access to EPCOT. The BoardWalk area is lively at night, with restaurants, performers, and people walking around. Yacht Club may feel more subdued than Beach Club, but the area around Stormalong Bay is often active.

    These resorts can still be right for your family. The question is whether location and transportation outweigh the busy shared spaces. While these properties are beautiful, they may lead to overstimulation or sensory overload if a family does not have a plan for quiet time.

    Room Requests and Daily Routines Matter

    Once you choose a resort, the room location can shape how comfortable the stay feels. Disney accepts room requests, but these requests are never guaranteed.

    Keep the request simple and tied to a practical need. You might ask for a room close to Disney World transportation because your child has difficulty with long walks. You might request a quieter area away from the pool, laundry room, ice machine, elevator, or main walkway.

    Avoid making several requests that work against each other. A room close to the lobby may also be near more foot traffic, while a room in a quieter building may require a longer walk. Choose the need that will help the most.

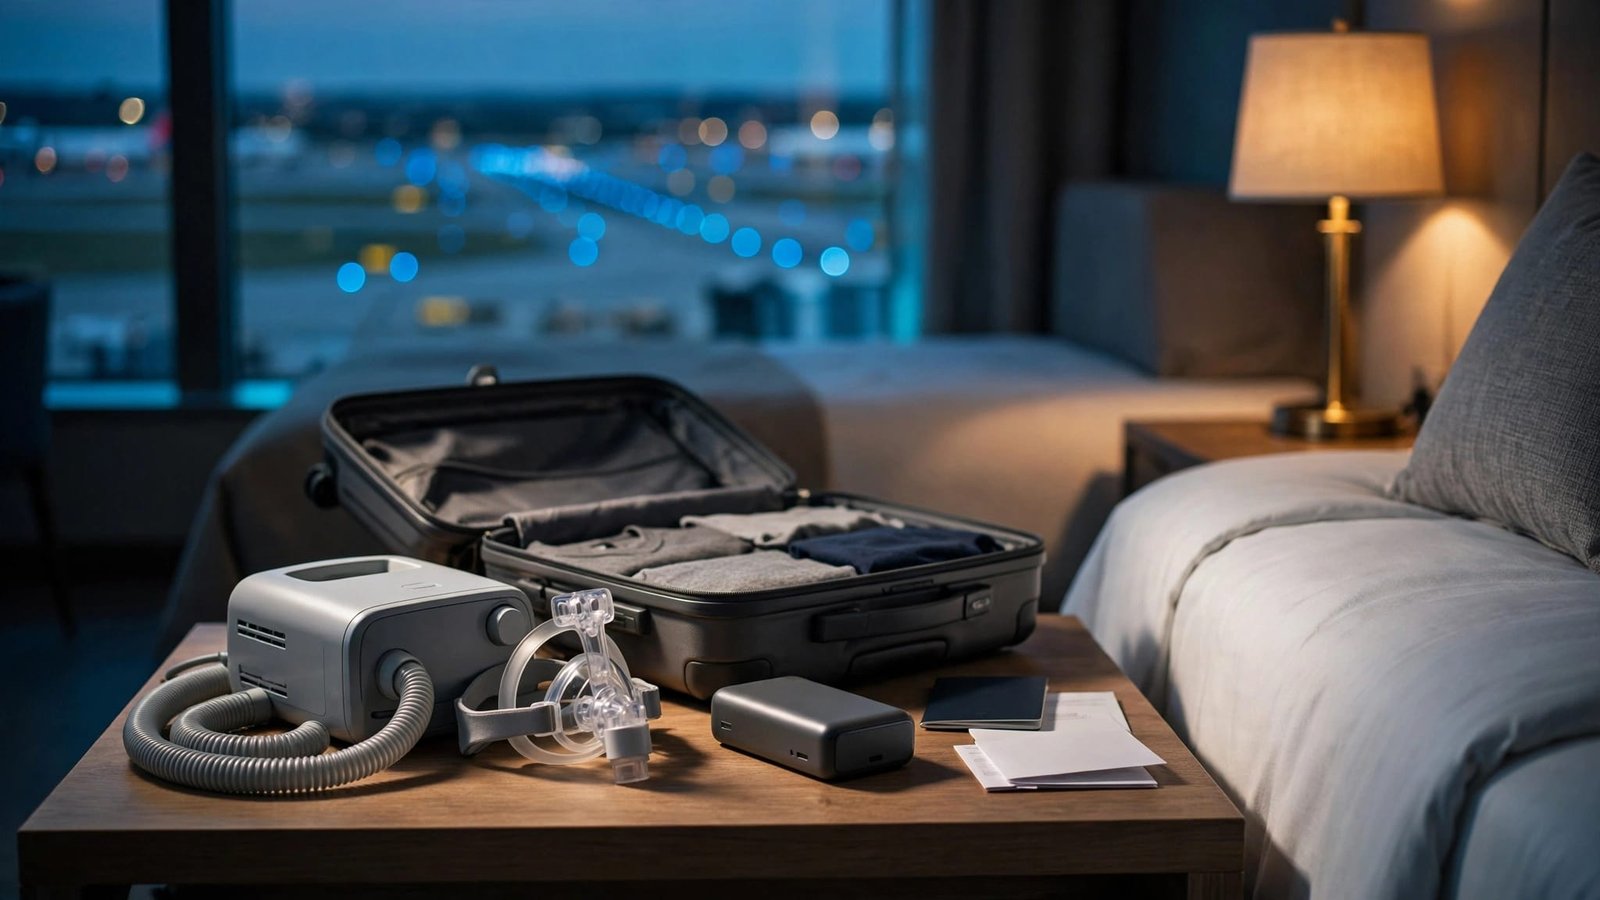
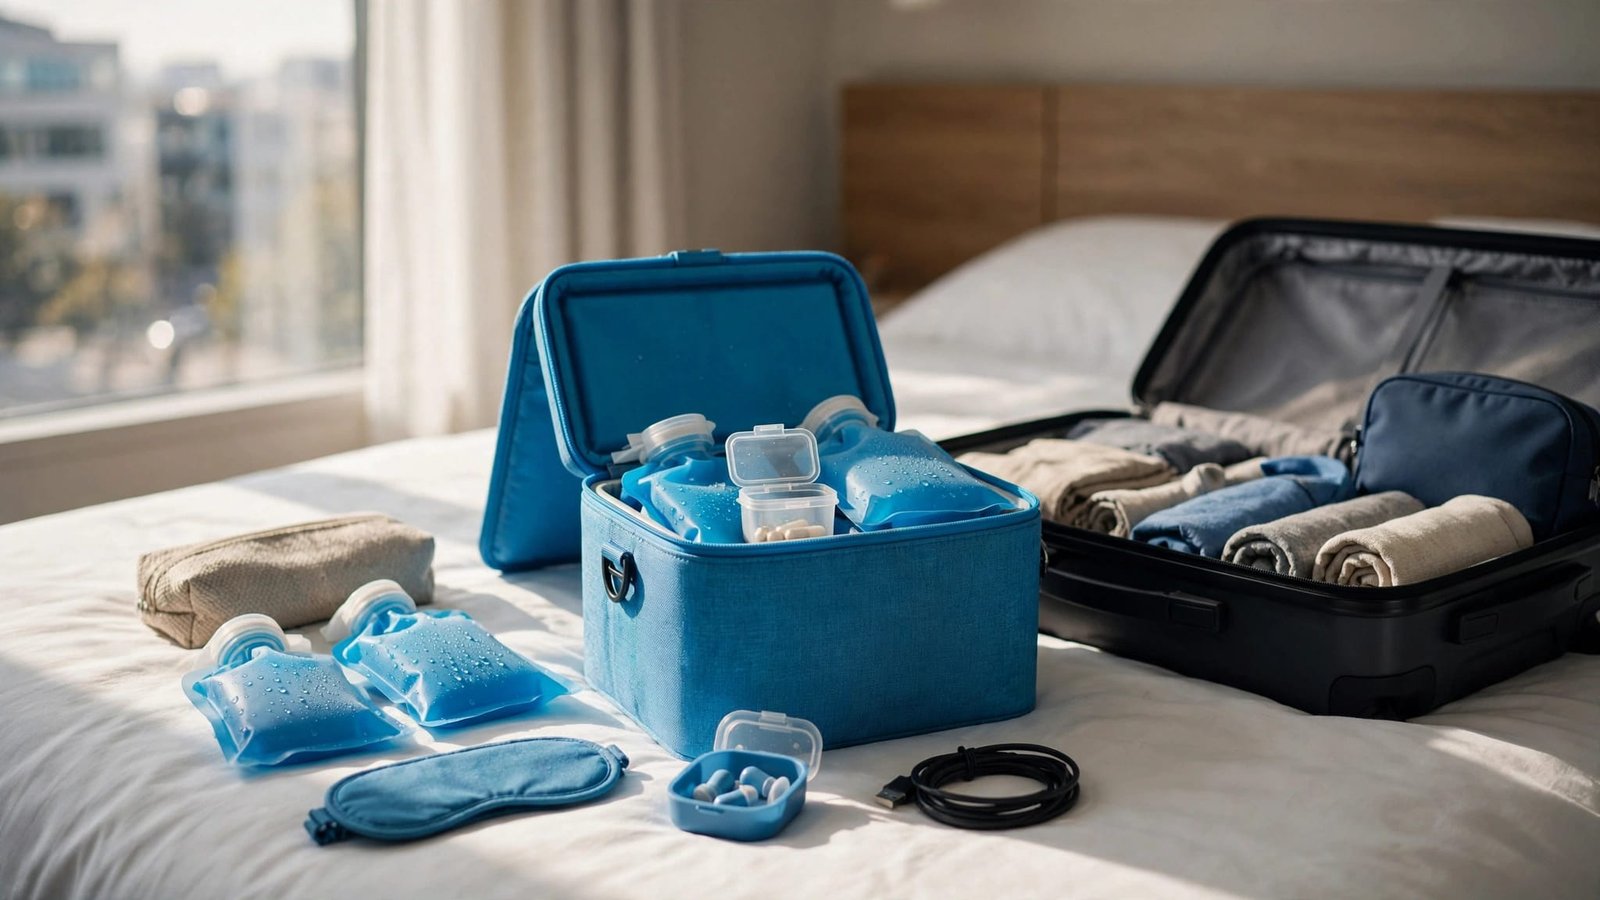
    Bring a few familiar items from home to help your child feel secure. Noise-reducing headphones, a visual schedule, and social stories can provide much-needed structure and comfort. Additionally, packing a favorite blanket, a night-light, a white-noise machine, familiar snacks, and downloaded shows can make an unfamiliar hotel room feel safer. Keep your portable charger handy for phones and tablets, which you can use for communication, calming videos, or to check Disney World transportation wait times and attraction return times via the My Disney Experience app.

    Plan the first day gently. You do not need to rush from the airport into a full Disney park day. Check in, find the food court, walk the route to the bus stop, and let your child see the pool or playground. A little familiarity can lower anxiety the next morning.

    Scheduled breaks are also a vital part of good Disney planning. Using these rest days for a pool visit, room break, laundry load, favorite movie, or quiet meal can help everyone recover. You do not need to fill every non-park hour with another Disney activity.

    For more practical support before your trip, the Disney World with Autism Guide PDF includes planning ideas for families preparing for Disney. You can also find the Disney with autism travel guide on Amazon for another easy planning resource.

    DAS, Lightning Lane, and Resort Planning Work Together

    Your hotel choice is important, but it is only one part of the trip. Disney’s Disability Access Service, often called DAS, is designed to support guests who are unable to wait in a conventional attraction queue for an extended period due to a developmental disability like autism.

    DAS is not a front of the line pass. Instead, it allows eligible guests to wait outside the physical queue and return later once the wait times have elapsed. Families can discuss their specific needs during DAS registration via a live video call before their trip or in person at Guest Relations upon arrival. Disney reviews each request individually, and an autism diagnosis does not automatically guarantee approval. Once registered, you can easily manage your DAS return times through the My Disney Experience app.

    Review Disney’s current Disability Access Service information before your trip, as policies, registration windows, and party size rules can change. Remember that DAS is separate from Lightning Lane Multi Pass and Single Pass. You do not need to purchase every available add on for a successful trip. Often, a good resort location, realistic park goals, midday breaks, and visiting during off peak times to avoid the largest crowds are enough to ensure a manageable experience.

    Disney also offers other accessibility options to improve your stay. The Disney World attraction and queue guide is a helpful resource to review before you arrive. It provides details on services like Rider Switch, which allows families to trade off supervision of children while waiting for attractions. Additionally, if your child needs a consistent environment for safety or mobility, you may want to request a stroller as wheelchair tag to help keep them secure in a familiar space throughout the parks. Combining these services with thoughtful resort planning will help your family have the best possible experience.

    Frequently Asked Questions

    Can I request a specific room location to help with sensory needs?

    Yes, you can add room requests to your reservation, though they are not guaranteed. Focus on simple, specific needs like being near transportation or, conversely, being away from high-traffic areas like elevators, ice machines, or pool decks.

    How do I handle familiar food requirements at a Disney resort?

    Choosing a resort with a kitchenette or family suite, such as those at Art of Animation or Old Key West, provides the ability to store and prepare familiar meals. You can also utilize grocery delivery services to stock your room with preferred snacks and drinks, ensuring your child always has comfortable food options available.

    Which Disney transportation is best for children with sensory sensitivities?

    This depends entirely on your child’s individual triggers. While the Skyliner offers a private and predictable cabin, some children find the movement or height difficult, whereas others may find the noise and crowded nature of standard buses more stressful. It is often helpful to preview ride-through videos online to gauge their reaction before your trip.

    Is it better to stay at a deluxe or moderate resort for an autism-friendly trip?

    Both categories offer benefits depending on your family’s specific needs. Deluxe resorts often provide better proximity to the parks, which can reduce travel time, but their larger, bustling lobbies might be overwhelming. Moderate resorts like Port Orleans French Quarter are often smaller and quieter, offering a more contained environment that some families find easier to navigate.

    Final Thoughts

    The best Disney World autism resorts are those that serve as a true sanctuary for your family, providing a comfortable place to reset after a day in the parks. Whether you decide on a spacious family suite at Art of Animation, a serene room at French Quarter, a relaxing villa at Old Key West, or a convenient boat ride away from Magic Kingdom at Wilderness Lodge, the priority should always be sensory comfort.

    To help navigate these choices, working with an Authorized Disney Vacation Planner can be a game changer. They can manage your specific room requests and help you build a trip that favors quiet resorts over high-energy hubs. Remember that a successful trip does not require a packed itinerary. Incorporating scheduled breaks into your day, or choosing to skip overwhelming character dining and loud shows, is an effective strategy to keep your trip manageable. Ultimately, a calmer, more intentional plan often creates the happiest memories for your family.

  • Disney World Lightning Lane Multi Pass for Families at Walt Disney World Resort

    Disney World Lightning Lane Multi Pass for Families at Walt Disney World Resort

    A Disney park day can feel long before lunchtime when your family is already facing a 70-minute wait. Using Disney World Lightning Lane helps you spend less time standing in lines, but only when you choose rides that fit your family and your park day. Once you have secured your theme park admission, you can use the Disney World Lightning Lane Multi Pass to skip the standard queues for many popular attractions.

    The goal is not to schedule every minute. The goal is to protect your time for the rides, meals, characters, breaks, and little moments your family will remember.

    A simple plan before your booking window opens can make the whole system feel much less stressful.

    Key Takeaways

    • Within the Disney Genie service, the Lightning Lane Multi Pass allows you to book up to three initial Multi Pass selections before your park day, subject to current availability and park rules.
    • Prioritize the attractions your family truly wants to experience, rather than focusing solely on rides with the longest wait times.
    • Try to use your first return time early in the day, as this allows you to make another selection as soon as you scan into your attraction.
    • Because Disney attraction tiers and ride availability vary by park, be sure to check the My Disney Experience app before finalizing your bookings.
    • Remember that a slower family schedule, frequent breaks, and realistic priorities are often more important for a successful trip than relying on every available paid add-on.

    What Lightning Lane Multi Pass Does at Disney World

    Lightning Lane Multi Pass is Disney’s paid service designed to help you skip the standby line at many Walt Disney World attractions. You select specific arrival windows through the My Disney Experience app, head to the attraction during your scheduled arrival windows, and enter through the designated Lightning Lane entrance.

    It is important to note that this is not a front of the line pass. You still have a scheduled time, and you may encounter a short wait after entering the queue. Even so, it remains a powerful tool to save a meaningful amount of time on popular rides.

    Multi Pass is distinct from Lightning Lane Single Pass, which you purchase separately for a small number of high demand attractions like TRON Lightcycle / Run. Additionally, for families seeking maximum convenience and flexibility, Disney now offers the Lightning Lane Premier Pass as a high tier alternative that provides access to these experiences without the need to select specific return times.

    For example, a family may use Multi Pass for attractions such as Haunted Mansion, Toy Story Mania!, or Remy’s Ratatouille Adventure. They may then decide separately whether a Lightning Lane Single Pass makes sense for another major attraction.

    Disney frequently updates eligible rides, prices, booking windows, and park tiers. Always review the current options in the app before you buy, as a plan that worked on a previous trip may not fit your visit this year.

    Lightning Lane Multi Pass works best when it supports your family’s day. It should not turn your vacation into a race across the park.

    The pass has a per person cost that changes by date and park. It can add up fast for a larger family, so think about where it will make the biggest difference. Buying it for every park day is not always necessary.

    Magic Kingdom and Hollywood Studios often give families the most opportunities to save time. Animal Kingdom can be more relaxed, depending on your attraction list. EPCOT can be a good choice when Frozen Ever After or Remy’s Ratatouille Adventure are high priorities.

    Know Your Booking Window Before You Travel

    Your Lightning Lane planning starts well before you enter the park. Before you begin booking, ensure you have valid theme park admission and a park reservation if your ticket type requires one. Access to booking depends on where you are staying, so it is vital to know your specific window. Guests staying at Disney Resort hotels can book their Lightning Lane Multi Pass selections up to seven days in advance of their entire stay. All other guests can book their passes three days in advance. Because booking access and timing can change, confirm your dates in My Disney Experience before your trip begins.

    When your window opens, you can typically choose up to three Multi Pass attractions and return times for a park day. At parks that use attraction tiers, you can usually select one attraction from the higher-demand group and two from the other group.

    That sounds simple until you are looking at three screens, comparing return times, and trying to remember whether your child is tall enough for a ride. A little preparation helps.

    Before your booking day, make a short family list for each park:

    1. Pick two or three rides that would disappoint your family if you missed them.
    2. Check height requirements for every child before reserving thrill rides.
    3. Decide whether you want an early start, a midday hotel break, or a slower morning.
    4. Keep dining reservations and transportation time in mind.
    5. Add one or two lower-pressure attractions that everyone can enjoy.

    Do not reserve a ride only because someone online called it a must-do. A family with toddlers may get far more value from Peter Pan’s Flight than Space Mountain. A group with teens may feel the opposite.

    Return times matter as much as the attraction itself. A reservation at 9:00 a.m. may be useful if your family plans to arrive for park opening. It is not useful if everyone will be tired after a late travel day and wants to sleep in.

    Think about your normal pace at home. Does your toddler still nap? Does your 8-year-old need frequent snacks? Does your teenager need time to recharge away from the group? Build around those habits instead of trying to force a high-energy schedule.

    Choosing the Right Multi Pass Attractions by Park

    The best Disney World Lightning Lane choices are not identical for every family. Wait times shift by season, weather, school breaks, and attraction downtime. Your priorities should lead the plan. While the system no longer uses official tiers, it is helpful to categorize your picks into high-demand Tier 1 options and more accessible Tier 2 experiences to balance your daily schedule.

    Here is a practical starting point for many first-time families.

    ParkAttractions families often prioritizeA practical approach
    Magic KingdomPeter Pan’s Flight, Jungle Cruise, Space Mountain, Tiana’s Bayou AdventureChoose one hard-to-get option, then reserve family-friendly favorites around it.
    EPCOTFrozen Ever After, Remy’s Ratatouille Adventure, Soarin’ Around the WorldReserve based on your children’s interests and avoid crossing the park all day.
    Hollywood StudiosSlinky Dog Dash, Mickey & Minnie’s Runaway Railway, Toy Story Mania!Book early because popular rides can disappear quickly.
    Animal KingdomNa’vi River Journey, Kilimanjaro Safaris, Expedition EverestPair reservations with shows, trails, and animal exhibits nearby.

    The table is a guide, not a strict rule. Disney changes attraction availability, and a ride may be closed temporarily during your visit. Check the app on booking day and make decisions based on what is offered.

    Magic Kingdom: Pick One High-Demand Favorite

    Magic Kingdom has enough rides to fill a full day, especially with younger children. That makes it one of the easiest places to over-plan.

    Keep in mind that some of the most popular attractions, such as Seven Dwarfs Mine Train or TRON Lightcycle / Run, are not included in the Multi Pass and require a separate Lightning Lane Single Pass purchase. Peter Pan’s Flight is often a priority for families with little ones, and Jungle Cruise can also draw long waits. Older children and teens may prefer an in-demand thrill ride when available.

    Do not reserve three attractions on opposite sides of the park. A morning in Fantasyland, an early afternoon in Frontierland, and a late reservation in Tomorrowland can create a lot of extra walking. Instead, group your day by land when possible. If you have a Fantasyland return time, use the surrounding time for It’s a Small World, The Many Adventures of Winnie the Pooh, the carousel, or a snack break. You will save energy and avoid the feeling of constantly being late for your arrival windows.

    EPCOT: Avoid Walking Back and Forth

    EPCOT is beautiful, but it is large. A Lightning Lane plan that sends your family from World Nature to World Showcase and back again can feel tiring fast.

    Frozen Ever After and Remy’s Ratatouille Adventure are common priorities for many families. Soarin’ Around the World is another popular choice, especially for groups that want a ride everyone can enjoy. Look closely at where your reservation is located. Remy’s is in the France pavilion, while Frozen is in Norway. They are not next door. If you reserve both, leave enough time for walking, meals, bathroom stops, and the chance that a child wants to look at something along the way. EPCOT is also a good park for a slower afternoon. Indoor attractions, aquarium time at The Seas, and a longer meal can give everyone a reset before the evening.

    Hollywood Studios: Use Early Return Times if You Can

    Hollywood Studios has several popular rides and fewer places to wander without a plan. It can feel busy early, especially during school breaks.

    Slinky Dog Dash is often one of the first Multi Pass selections families look for. Mickey & Minnie’s Runaway Railway, Toy Story Mania!, The Twilight Zone Tower of Terror, and Millennium Falcon: Smugglers Run may also be good choices, depending on your group. If you can get an early Lightning Lane return time, take it. Once you tap into your first selection, you can look for another Multi Pass option in the app. That gives you more flexibility later in the day.

    Playful Pluto character waving during a sunny Orlando parade at an amusement park

    Photo by Craig Adderley

    A good Hollywood Studios day also needs downtime. Watch a show, sit in the shade, share a snack, or take a calm walk through Star Wars: Galaxy’s Edge. Not every open hour needs a ride reservation.

    Animal Kingdom: Use Multi Pass Without Rushing

    Animal Kingdom can feel less intense than other parks because there is more to enjoy beyond rides. Animal trails, shows, exhibits, and shaded paths give families natural breathing room.

    Na’vi River Journey is a popular choice for many families. Kilimanjaro Safaris can be a strong option when the timing works for your plans. Expedition Everest may be right for thrill-seeking kids and adults. The park usually rewards a slower approach. A family can use a Lightning Lane return time, see Festival of the Lion King, explore Gorilla Falls Exploration Trail, and still have a full day. You do not need to chase every available reservation.

    Build a Park Day Around Your First Reservation

    Your first reservation helps shape the day. If it is early, arrive with enough time to get through security and the park entrance without stress. If it is later, do not feel pressured to rope drop unless your family enjoys early mornings. When you are ready to enter, using a MagicBand+ offers a seamless experience when scanning into attractions and accessing the park.

    After you redeem your initial Multi Pass selections, open the My Disney Experience app and make your next choice. Do this soon after scanning into the attraction. Waiting until lunch can mean fewer return times are available. Remember to check your Disney PhotoPass photos in the app after your ride, as these memories are often included with your experience.

    A comfortable rhythm often looks like this:

    • Start with one priority attraction or a low-wait ride near the entrance.
    • Use your first Lightning Lane return time before the middle of the day when possible.
    • Choose your next available return time immediately after scanning in.
    • Take a real meal break, indoor break, or hotel break before everyone hits a wall.
    • Make evening plans based on energy, not the original schedule.

    You can modify reservations when something changes. Attraction closures, rain, missed buses, tired kids, and surprise snack stops happen. Check the app for a different return time rather than trying to push everyone through a plan that is no longer working.

    Keep your phone charged. Lightning Lane, mobile food ordering, park maps, dining reservations, and family communication can drain a battery quickly. A portable charger is one of the least exciting items in your park bag, but it can save a lot of frustration.

    Make Lightning Lane Work for Kids of Different Ages

    A good reservation is one your family can use without anyone feeling left out. That sounds obvious, but it is easy to forget when a popular thrill ride appears in the app.

    For toddlers and preschoolers, focus on rides with lower height requirements and familiar themes. By using Lightning Lane to skip the standby line, you can minimize wait times and keep little ones happy before they get restless. Always leave room for naps, playground time, parades, character meetings, and quiet indoor breaks. A child who is overwhelmed will not care that you booked a popular ride.

    School-age children can often handle more rides, but they still need food and rest before the late-afternoon crash. Give them a small choice during the day. Let them choose between a character stop and a snack, or between two nearby attractions.

    Teens may want bigger attractions and more freedom. Ask for their top three priorities before your booking day. They are more likely to stay engaged when they feel heard. They will also appreciate a break, even if they insist they do not need one.

    Rider Switch may help when one child does not meet a height requirement or does not want to ride. Ask a Cast Member at the attraction entrance about the current process. It allows adults to take turns without waiting through the full standby line twice, ensuring everyone gets a chance to enjoy the best rides at the park.

    Lightning Lane, DAS, and Autism Travel Planning

    It is important to understand that the Lightning Lane Multi Pass and Disney’s Disability Access Service, known as DAS, are entirely different tools. One is a paid planning option, while the other is an accessibility service for guests who qualify based on their specific disability related needs. You will manage both services through the My Disney Experience app, which serves as the central hub for your park day itinerary.

    Families should not assume that Lightning Lane Multi Pass replaces DAS, or that DAS replaces a thoughtful planning strategy. A child may need shorter wait times, more flexibility, sensory breaks, or a calmer park pace. These individual needs deserve careful attention well before your trip begins.

    DAS eligibility and procedures can change, and Disney determines access through its current registration process. Once DAS is active, the registered guest must be present and ride with the group. Families can generally hold one DAS return time at a time, then request another after using the previous one.

    You can learn more about this part of planning in the Disney World with Autism guide on Etsy or the Disney autism travel guide on Amazon. Both resources can help families think through sensory needs, queue challenges, rest breaks, and practical park day support.

    A comfortable Disney day might include one Lightning Lane reservation, one DAS return time, a favorite snack, and a long break at the resort. That is still a successful day. Your family does not need to prove anything by staying from rope drop through fireworks.

    Common Lightning Lane Multi Pass Mistakes

    The most common mistake is purchasing the Lightning Lane Multi Pass without a clear strategy for your day. If your family only intends to ride attractions with consistently short standby lines, the additional cost may not feel worthwhile compared to the value you receive. Many returning guests still remember this system as Genie+ or the Disney Genie service, but regardless of the name, the goal remains the same: planning ahead to save time.

    Another issue is selecting return times that do not align with your daily schedule. A 1:00 p.m. reservation might conflict with your lunch plans, while a late evening slot could prove difficult for a child who is usually asleep by that time.

    Families also lose valuable time by booking rides that are geographically far apart. While walking is an inevitable part of a Disney World vacation, there is no reason to turn your day into a stressful marathon between park lands.

    Additionally, avoid overestimating how much your family can accomplish in one day. Disney portions are large, the Florida heat is intense, and even the most exciting days can become physically draining. Often, three well-chosen attractions feel much better than six reservations that leave everyone feeling hungry, rushed, and exhausted.

    Finally, do not treat paid planning tools as an absolute requirement for a successful vacation. While the Lightning Lane Multi Pass can be a helpful convenience, it is not the entirety of the Disney experience.

    Frequently Asked Questions

    Can I buy Lightning Lane Multi Pass for only one day of my trip?

    Yes, you can purchase the Multi Pass on a day-by-day basis. It is often most helpful to buy it only for the parks where your family has the most “must-do” attractions that typically have long wait times.

    Do I need to be a guest at a Disney Resort hotel to use the Lightning Lane system?

    No, all guests with valid theme park admission can use the Lightning Lane Multi Pass. However, guests staying at Disney Resort hotels gain a significant advantage by being able to book their selections up to seven days in advance.

    What happens if I miss my scheduled return time for a Lightning Lane reservation?

    If you miss your window due to an unforeseen delay, speak with a Cast Member at the attraction entrance. They can often provide guidance on whether you are still able to use the pass or if you should look for a new time in the app.

    Can my family use both Lightning Lane Multi Pass and Lightning Lane Single Pass on the same day?

    Absolutely, these two services are designed to work together. You can use Multi Pass for multiple attractions throughout the park while purchasing a separate Single Pass to access a high-demand ride like TRON Lightcycle / Run.

    A Better Disney Day Starts With the Right Priorities

    The Disney World Lightning Lane Multi Pass is most helpful when it saves time on the rides your family truly cares about. Choose a few priorities, book return times that fit your real schedule, and stay flexible when the day changes.

    The best park plan leaves room for snacks, shade, bathroom breaks, and unexpected fun. Less waiting is wonderful, but a calmer family is even better. By keeping these strategies in mind, you can maximize your enjoyment across the Walt Disney World Resort. Remember that the goal of using the Disney World Lightning Lane is to spend more time making memories together rather than standing in queues.

  • Disney World Autism Guide: DAS, Sensory Prep, Park Plans

    Disney World Autism Guide: DAS, Sensory Prep, Park Plans

    A Disney vacation can be full of happy memories, but it can also bring noise, crowds, long lines, and plans that change without warning. For families planning Disney World with autism in mind, a little extra preparation can make a huge difference.

    Your child does not need to experience Disney the same way as every other guest. The goal is not to fit everything into one day. The goal is to create a trip that feels safe, comfortable, and fun for your family.

    Start with a simple plan, then leave room to change it. Engaging in thorough Disney vacation planning is the foundation for a successful experience that meets your family’s unique needs.

    Key Takeaways

    • The Disney Disability Access Service (DAS) may assist guests who are unable to tolerate a traditional attraction queue due to a developmental disability, including autism.
    • A slower park day with built-in breaks is often more enjoyable than trying to experience every attraction.
    • Sensory tools, familiar foods, visual schedules, and a calm exit plan can prevent small stressors from escalating into a difficult day.
    • Choose attractions based on your child’s sensory needs, rather than focusing solely on height requirements or park popularity.
    • A written plan can help your family feel prepared before leaving home.
    • Every autistic child has unique needs, and your overall Disney World strategy should remain flexible to accommodate their comfort.

    Start With Your Family’s Real Needs

    There is no single Disney World autism plan that works for every child or adult. While many neurodivergent guests enjoy the magic of the parks, the experience must be tailored to the individual, whether you are planning for a sensory-sensitive child or an adult with autism who requires a more relaxed pace. Some guests love fast rides, character greetings, fireworks, and busy restaurants. Others need quiet spaces, familiar routines, and plenty of time away from crowds.

    Think about the parts of a typical day that are hardest at home or during other trips. Is waiting difficult? Does your child struggle with loud sounds, unexpected changes, heat, touch, or unfamiliar food due to sensory processing disorder? Does a long day create fatigue that shows up as anxiety, tears, or shutdowns?

    Write down what helps. That list is more useful than trying to copy another family’s vacation.

    You may already know that noise-canceling headphones help at school. Maybe a favorite stuffed animal, tablet, chewy necklace, sunglasses, or snack provides comfort. Bring those items. Disney World is not the place to test whether your child can go without a support tool.

    It also helps to talk about the trip in small pieces. Show photos of the hotel, pool, buses, monorail, and park entrances. Watch ride videos with the sound low at first. Explain that there will be security, bag checks, long walks, and waiting.

    A visual countdown can make the trip feel more predictable. Mark travel day, hotel check-in, each park day, and the day you go home. Many children do better when they can see what comes next.

    If your child uses a communication device, make sure it is charged and loaded with useful phrases. Add simple requests such as “I need a break,” “too loud,” “I am hungry,” and “I want to leave.” A small card in a backpack can help, too.

    A successful Disney day is not measured by ride count. It is measured by how your family felt while you were there.

    Understanding Disney’s DAS Pass for Autism

    Disney’s Disability Access Service (DAS) is an accommodation for guests who cannot tolerate a traditional attraction queue due to a developmental disability such as autism. It is not a front of line pass. Instead, it allows an eligible guest to wait virtually for attractions, receiving a return time based on the current standby wait so they can wait in a more comfortable environment.

    That difference matters. If an attraction has a 50 minute standby wait, your family may receive a return time for about 50 minutes later. During that time, you can sit in a calmer area, use the restroom, eat a snack, visit another nearby attraction with a shorter wait, or take a sensory break.

    Disney decides eligibility on a case by case basis. Focus on the functional challenge, not only the diagnosis. Explain what happens when your child waits in a close, crowded line. Be honest and clear about your needs. For example, you might explain that your child may panic in a confined queue, cannot handle people standing close behind them, or may leave the line suddenly when overwhelmed. If you have specific questions about these processes once you arrive at the parks, you can always visit Guest Relations for further assistance.

    Disney’s current process can change, so check the latest DAS details before your trip. Eligible guests may be able to complete a video interview before arrival, usually within Disney’s stated pre-arrival registration window. Have the registered guest available for the conversation and keep your travel party information ready.

    Once approved, DAS return times are managed through the My Disney Experience app. You can usually hold one active DAS return time at a time. After you redeem it, you can select another eligible attraction.

    Disney may also offer DAS Advance Planning selections before your visit. These are limited return windows for certain attractions and are subject to availability. Do not build your whole day around them. Think of them as helpful starting points.

    DAS does not cover every part of the vacation. You may still wait for transportation, food, security, restrooms, and character experiences. That is why sensory planning still matters.

    lightning lane passes are separate from DAS. Disney’s lightning lane options and policies can change, and they may be useful for some families. Still, you do not have to purchase every add-on. A simple schedule with DAS, breaks, and a few favorite attractions can be enough.

    For extra support, the Disney World With Autism guide on Amazon includes practical planning ideas for DAS, sensory preparation, and park days with autistic children.

    Build a Sensory Plan Before You Pack

    A sensory kit does not need to be expensive or complicated. It simply needs to include the items your child already uses and trusts. Keep everything in one dedicated backpack so you can reach for it easily during a busy moment.

    Consider packing:

    • Noise-canceling headphones or ear defenders for fireworks, parades, ride queues, and crowded indoor spaces.
    • Sunglasses or a hat for protection against the bright Florida sun and visual stimulation.
    • A Sunflower Lanyard to help Cast Members easily identify that someone in your party has hidden disabilities.
    • Fidget items, a comfort object, or a favorite small toy.
    • Familiar snacks, refillable water bottles, and electrolyte packets if your child struggles with heat.
    • Wet wipes, spare clothing, cooling towels, and a small portable fan.
    • A charging bank for phones, tablets, communication devices, and noise-canceling headphones.

    Test the backpack before the trip. Walk around your neighborhood, visit a busy store, or spend time at a local attraction. Notice which items your child reaches for first, as these are the items that should stay at the top of the bag.

    Make a simple sensory exit plan for each park day. Pick one meeting location near the entrance in case your group gets separated. Choose a calmer place where your child can reset. Tell everyone in the travel party what to do if your child needs to leave an attraction queue or restaurant right away.

    Disney parks have First Aid locations, Baby Care Centers, restrooms, and quieter walkways. These areas are not always silent, but they can offer a necessary break from the busiest paths. Cast Members can also help point you toward a nearby place to regroup.

    Do not wait for a full meltdown before taking a break. Watch for early signs such as covering ears, becoming unusually quiet, pacing, repeating questions, refusing food, or becoming upset over a small change. Managing sensory overload and preventing overstimulation is the primary goal of taking these proactive, 15-minute resets, which can truly save the rest of your day.

    Choose a Disney Park Strategy That Leaves Room to Breathe

    Trying to rope-drop every park, stay until fireworks, and fill every hour is exhausting for many families. It can be especially difficult when you are visiting Disney World with an autistic child.

    Choose one or two must-do experiences for the morning. Everything else is extra. If your child wakes up tired, needs more pool time, or wants to repeat a favorite ride, you can adjust without feeling like the day is ruined. If you need expert help navigating these logistics, an authorized Disney vacation planner can help you identify lower crowd levels to better manage your schedule.

    Magic Kingdom has the most classic Disney experiences, but it also has heavy crowds, parades, music, and a lot of visual stimulation. Start in one land instead of crossing the park all morning. Fantasyland is often a good first stop for families with younger children, while Tomorrowland may be a better fit for guests who enjoy space themes and faster rides.

    EPCOT has wide walkways and plenty of room around the World Showcase, which can make it feel less crowded in some areas. If you are looking to avoid crowds, the spaciousness of this park makes it an ideal choice for a slower afternoon away from the busier entrance area.

    Disney’s Hollywood Studios has popular attractions and can feel intense early in the day. Walt Disney Presents is often a calmer indoor stop when your group needs air conditioning and a seated break. Keep in mind that some shows and rides include sudden sounds, darkness, smoke effects, and loud music.

    Animal Kingdom offers shaded paths, animal trails, and a slower pace in some sections. Maharajah Jungle Trek and Gorilla Falls Exploration Trail can be good breaks for families who enjoy animals and walking. Animal Kingdom also closes earlier than some parks, which may work well for children who do not do well with late nights.

    A midday hotel break is one of the best tools you can use. Leave before your child reaches the point of overload. Swim, rest, eat a familiar lunch, change clothes, or spend quiet time in the room. You can return later if everyone feels ready. For families staying at Disney resorts, utilizing non-park days for total relaxation is a fantastic way to recharge between busy park visits.

    A hotel break is part of the plan, not a failed park day.

    Pick Attractions With Sensory Needs in Mind

    Height requirements tell you whether a child can ride, but they do not tell you whether the experience will feel comfortable for an autistic child with specific sensory challenges. Read attraction descriptions, watch ride-through videos, and consider the full sensory experience.

    Some rides are gentle but still dark, noisy, or full of unexpected motion. Others move quickly but have less visual chaos. Your child’s personal preferences matter most.

    For guests who prefer calmer experiences, options may include the Walt Disney World Railroad, PeopleMover, Living with the Land, or animal trails at Animal Kingdom. These are not guaranteed to be quiet, but they often have less intensity than major thrill rides.

    Attractions with loud sounds, darkness, drops, sudden movement, or frightening scenes may need more preparation. The Haunted Mansion in Magic Kingdom has spooky images and a dark ride system. Pirates of the Caribbean has cannon fire, darkness, and a small drop. Mickey and Minnie’s Runaway Railway uses quick scene changes and strong visual effects. Star Wars attractions can be loud and busy.

    Fireworks are another big decision. Some children love them, while others find them painful. You do not have to stand in the middle of Main Street, U.S.A. to enjoy the evening.

    Try watching from farther away, leaving before the show begins, or skipping fireworks altogether. Resort pools, a favorite dinner, and an early bedtime can be a much better ending for your family.

    Parades can also create crowd pressure because people begin saving spots early. If waiting for a parade is difficult, watch from a less crowded viewing area, catch only part of it, or walk through another area of the park while it is happening.

    For high-demand experiences, keep in mind that you may need to join a virtual queue in addition to utilizing your DAS pass. Regardless of the wait method, give your child choices when possible. Asking “Do you want to ride the train or get a snack?” is easier than asking “What do you want to do now?” Small choices help children feel more in control when the environment is large and unfamiliar.

    Make Food, Transportation, and Hotel Time Easier

    Food can become a major stress point when everyone is hot, hungry, and overstimulated. Disney offers many dining options, but you do not need every meal to be a themed experience.

    Bring familiar snacks and plan meals before hunger hits. Using mobile ordering at Disney World restaurants can reduce time spent standing in a food court line. When available, choose an off-peak meal time. A quick-service lunch at 11:00 a.m. is often easier than a crowded noon rush.

    If your child has allergies or a special diet, let Disney know in advance and speak with a Cast Member when ordering. Do not assume a familiar-looking food is prepared the same way as it is at home.

    Transportation deserves the same planning attention as attractions. Buses, monorails, boats, Skyliner gondolas, and parking trams can all involve waiting, close spaces, noise, and sudden changes. Explain these steps before travel day.

    Some children love the monorail and Skyliner. Others find movement or enclosed spaces difficult. Build extra time into every transfer so you are not rushing.

    Your hotel choice can make a real difference. Disney resorts offer a wide variety of environments, and special needs travelers should choose one that fits their specific sensory profile. A resort close to a park may make midday breaks easier. A quieter room location away from the pool, lobby, elevator, or bus stop may help your child sleep better. Request needs early, but remember that requests are not guaranteed.

    Keep the first night simple. Unpack comfort items, visit the pool if that helps, eat an easy dinner, and get rest. You do not need to begin the vacation with a packed park evening.

    Use a Flexible Daily Routine

    Children often feel safer when the day has a familiar pattern. Disney days can still have structure, even when plans change.

    A simple routine might look like this:

    1. Eat breakfast and review the day’s visual plan.
    2. Arrive early for one or two favorite attractions.
    3. Take a snack and sensory break before the busiest part of the day.
    4. Use DAS or return times for high-priority attractions.
    5. Leave for lunch, pool time, or rest at the hotel.
    6. Return only if your family has the energy and interest.

    Keep the schedule visible. A paper list, phone note, or laminated visual card can work well for your Disney World autism planning needs. Cross off activities as you complete them. If something changes, show your child what is replacing it.

    Use clear language. Instead of saying, “We will see what happens,” try, “First, we ride the train. Then, we have a snack. After that, we decide if we want one more ride.”

    Prepare for disappointment before it happens. A ride may close, weather may delay outdoor plans, or a favorite character may not be available. To help your autistic child adjust, bring a backup choice for each must-do item. “If Big Thunder Mountain is closed, we can ride Pirates or take the train.” This gives your child a next step instead of an abrupt no.

    A printable plan can make these moments easier. If you need additional help, an authorized Disney vacation planner can often provide a customized printable schedule to keep you organized. Alternatively, the Disney World autism planning guide on Etsy offers a PDF resource for families who want help organizing DAS details, sensory supports, and flexible park plans.

    Let Your Child’s Comfort Lead the Day

    There may be moments when you need to leave a line, skip a reservation, or head back to the hotel early, and that is perfectly okay. Because an autistic child may experience sensory overload or sudden overstimulation without much warning, it is important to recognize when it is time to take a break. Disney World is large, busy, and full of sensory input, and your family does not need to push through distress to make the trip feel worthwhile.

    Celebrate the wins that matter to your child. Maybe they tried a new ride. Maybe they asked for a break before becoming overwhelmed. Maybe they enjoyed one character greeting, a pool afternoon, or a favorite snack.

    Those moments count.

    Talk with your child before the trip, listen during the trip, and adjust as needed. A plan gives you direction, while flexibility gives your family room to enjoy the day.

    Frequently Asked Questions

    How do I know if my child qualifies for the Disability Access Service (DAS)?

    DAS is intended for guests who, due to a developmental disability like autism, cannot tolerate waiting in a traditional attraction queue for an extended period. During your registration, focus on the specific functional challenges your child faces in crowds rather than just the diagnosis. Be prepared to explain what happens when your child is in a confined space for a long duration.

    Can I use my sensory tools during the rides and in the parks?

    Yes, you are encouraged to bring and use any sensory tools that provide comfort or support to your child. Items like noise-canceling headphones, fidgets, and communication devices are welcome in most areas, including queues and during attraction experiences. Always ensure these items are easily accessible in a designated sensory backpack for quick use when needed.

    What should I do if my child has a meltdown at the parks?

    First, remember that your child’s well-being is the top priority, and taking a break is a success, not a failure. Quickly move to a quieter location, such as a Baby Care Center, a First Aid station, or an outdoor area away from the main thoroughfares to allow for a reset. Having a pre-planned exit strategy and a designated meeting point will help your family feel calm and prepared when emotions run high.

    Is it possible to avoid the busiest times at Disney World?

    While Disney World is rarely empty, you can manage the environment by utilizing early mornings for your must-do activities and retreating to your resort during the peak mid-day heat and crowds. Opting for less popular attractions, dining during off-peak hours, and choosing parks that naturally offer more space can also help minimize overstimulation throughout your stay.

    A Disney World Trip That Fits Your Family

    The most meaningful Disney vacations are not always the busiest ones. With DAS preparation, sensory supports, familiar routines, and realistic expectations, your family can create a trip that feels more comfortable and more enjoyable.

    Traveling to Disney World with autism can require extra planning, but proactive Disney vacation planning allows for more spontaneous moments of joy without the need to schedule every single minute. Focus on your child’s needs, protect time for breaks, and let comfort guide the daily itinerary.

    A calm day with a few happy memories is always enough.

  • Disney Disability Access Service: First Visit Guide

    Disney Disability Access Service: First Visit Guide

    A first Disney trip can feel overwhelming before you even reach the theme park gates. There are tickets, hotel plans, transportation, dining, weather, crowds, and long attraction lines to consider.

    For guests with disabilities, chronic illnesses, neurodivergence, or other access needs, a thoughtful plan can make the day feel far more comfortable. The Disney Disability Access Service, often called DAS, may be one part of that plan for your theme park visit, but it is not the right fit for every guest.

    The goal is not to rush through the park. It is to create a Disney day that feels manageable, enjoyable, and built around your family’s needs.

    Key Takeaways

    • Disney reviews DAS requests on an individual basis. Registration is not guaranteed, and a formal diagnosis alone does not determine your eligibility for the program.
    • DAS is designed specifically for guests who cannot wait in a conventional queue for an extended period due to a developmental disability, such as autism or a similar condition.
    • Guests can register through a live video chat or in person at Guest Relations, depending on current Disney procedures and availability.
    • DAS allows an eligible guest to wait outside the physical wait in line and return to the attraction later. It is not a service designed to let you skip attraction waits entirely.
    • Disney offers other accessibility supports that may be a better match for specific mobility needs, medical needs, sensory needs, or a family member’s care routine.

    What Disney Disability Access Service Is, and What It Is Not

    The Disney Disability Access Service is a program that provides eligible guests with a return time for an attraction instead of requiring them to wait in standard standby lines. During this designated period, your family can relax in a calmer space, enjoy a snack, use the restroom, or participate in another nearby activity. Once your return time arrives, the registered guest and their party enter the attraction to experience it with a shorter wait.

    DAS is not a front of the line pass. It does not eliminate the need to wait in line, and it does not provide immediate ride access. The system is designed to provide a more manageable way to wait when a guest is unable to wait in line in a traditional environment.

    Disney states that DAS is intended for guests who, due to a developmental disability like autism or a similar condition, are unable to wait in a conventional queue for an extended period. During the registration process, a cast member will discuss the specific needs of the guest to determine their eligibility for the program or identify if another accommodation is more appropriate.

    This distinction is important. A person may have a medical condition or chronic illness and still find that a different accessibility option is a better fit. For instance, mobility concerns are often addressed through the use of a wheelchair or ECV, which allows guests to navigate attraction queues more comfortably.

    The most helpful plan is not the plan with the most attractions. It is the plan that gives your traveler enough comfort, time, and support to enjoy the day.

    Before your trip, review the current Walt Disney World DAS information or the Disneyland Resort DAS information online. Policies, registration details, and attraction procedures can change, so staying updated will help you navigate the parks with confidence.

    Start With Your Traveler’s Real Needs

    It is easy to focus on a program name and forget the bigger question: what makes a park day difficult for your traveler?

    Think about the full experience, not only attraction queues. A guest may have trouble with heat, standing, crowded walkways, noise, food routines, medication timing, fatigue, sensory overload, or limited access to restrooms. Often, sensory issues make navigating traditional attraction queues particularly challenging. These needs may affect different parts of the day.

    A DAS conversation focuses on why you cannot wait in line in a conventional manner. Disney does not need a detailed medical history, and a medical professional is not required for the registration process. You do not need to force your family into a label or try to use the right words.

    Keep your explanation simple, honest, and focused on the guest’s day-to-day needs. For example, you might explain that a guest cannot remain in a crowded, enclosed queue for a long period, or that waiting without access to a quiet space creates distress.

    Avoid planning around an assumption that DAS will be approved. Build a park plan that still works if Disney recommends a different option. That approach takes pressure off the registration conversation and gives you more than one path forward.

    It also helps to consider your travel dates. A busy holiday week, a hot afternoon, or a late-night event may feel very different from a shorter weekday visit. Your family may have a wonderful trip with fewer hours in the theme park, a midday hotel break, or an extra rest day.

    Disney vacations are not one-size-fits-all. A four-day plan with room to breathe can feel much better than a packed schedule that leaves everyone exhausted, regardless of whether you are utilizing DAS.

    How DAS Registration Works for First-Time Guests

    Disney offers a convenient registration process for guests seeking Disability Access Service. The most comfortable way to secure your pass is through a live video chat, which allows you to handle the conversation from home before your vacation begins. While your dining reservations might start 60 days in advance, you can initiate this registration process as early as 30 days in advance.

    The registered guest must be present for the live video chat. If the guest is a minor, a parent or legal guardian manages the call. Disney may take a photo of the guest during this live video chat for verification purposes. Guests who cannot complete this process online may speak with a cast member at Guest Relations once they arrive at the parks.

    Requirements can differ between Walt Disney World Resort in Florida and Disneyland Resort in California. Check official information before you travel, especially if you are visiting during a high-demand period.

    Registration optionWhen it happensWhat to remember
    Pre-arrival video chatBefore your Disney tripThe guest seeking DAS must be present, and wait times for chat may vary.
    In-person Guest RelationsOnce you arrive at the resortBuild extra time into your first park day for the conversation.
    Re-registrationAfter DAS expiresDisney requires guests to register again after the current validity period ends.

    DAS is generally valid for the length of a guest ticket or stay, up to 240 days under current policies. Disney can change this timeframe, so confirm the details before booking a return trip. During registration, the cast member will also set up your travel party. Current guidelines generally allow the DAS guest and up to three additional people, for a total travel party of four. Larger immediate families may be considered in some situations, so be sure to discuss your specific group size during the conversation.

    A few practical steps make registration easier:

    1. Set up your Disney account early. Walt Disney World uses the My Disney Experience app, while Disneyland Resort uses the Disneyland app. Link tickets and hotel plans before your registration window opens.
    2. Keep your plans nearby. Have your travel dates, park tickets, and the names of people in your travel party ready before the conversation begins.
    3. Plan for wait time. Availability can vary for the virtual process, so choose a calm time at home when the registered guest is comfortable and available.
    4. Ask clear questions. If Disney approves DAS, ask how to request return times, how many people can join your group, and what specific accessibility options apply during your visit.

    Disney may offer advance planning options for some registered guests. Those offerings can change, and attraction availability is limited. Treat any advance selections as helpful extras, not the foundation of your entire vacation.

    Build a Park Day Around Comfort, Not Constant Motion

    A theme park day can begin before sunrise and end after dark. First-time visitors often try to fit every attraction, parade, meal, character, and fireworks show into one day. That pace can be hard on anyone.

    Start with two or three priorities for each theme park. Maybe your family wants to ride Peter Pan’s Flight, meet Mickey, and watch the fireworks. Maybe the big goal is Star Wars: Galaxy’s Edge, Kilimanjaro Safaris, or a calm afternoon at EPCOT’s aquarium.

    Everything else is a bonus.

    If DAS is approved, you can request a return time through the appropriate Disney app for participating attractions. This return time is designed to be comparable to the current standby wait. While you wait, you are free to spend time elsewhere in the park.

    That flexibility is useful, but it can still create a busy day if you overfill the time between attractions. Do not feel pressured to turn every DAS window into another ride, another snack stop, and another long walk across the park.

    Use that time for what your traveler needs. Sit in shade. Eat something familiar. Refill water bottles. Step into a shop for air conditioning. Find a quieter corner. Go back to the hotel if the day is becoming too much.

    The following rhythm works well for many first-time Disney visitors:

    Part of the dayA comfortable approach
    MorningStart with one high-priority attraction before crowds build.
    Late morningRequest a return time, then choose a low-pressure activity nearby.
    MiddayTake a meal break, indoor break, or hotel rest if needed.
    AfternoonReturn for one or two priorities without racing across the park.
    EveningDecide based on energy, not the original schedule.

    A printed plan can be helpful, but it should never feel like a test. You do not always have to wait in line for the next attraction if your family needs a break. Disney days change because of weather, tired feet, attraction closures, hunger, or an unexpected great moment with a character.

    Leave room for those moments.

    Using DAS in the Disney Parks

    Once DAS is active, the registered guest or someone connected to their Disney account can request a return time through the My Disney Experience app. Find your desired attraction, choose the DAS option, and select the members of your party who will ride. You can generally hold one DAS return time at a time. After you redeem your DAS return time, you may request another available return time. If you encounter any technical issues or have questions regarding attraction queues, feel free to stop by a Guest Experience Team kiosk where a helpful Cast Member can assist you.

    The DAS guest must be present and must ride with the group. Disney uses photo verification and other checks at attraction entry. Do not make plans for other family members to use the service without the registered guest. Attractions, procedures, and return-time availability can vary, so check the app often and ask a Cast Member if something is unclear.

    Keep your phone charged. A portable battery can save a lot of frustration when you are using mobile tools for DAS return times, dining reservations, park maps, virtual queue selections, and communication with your group.

    DAS also works alongside other Disney planning tools, but they are not the same thing. Lightning Lane access is a separate service, and its availability, cost, and rules can change. If your family chooses to use Lightning Lane Multi Pass or Single Pass options, review the current details in the app before purchasing. Do not feel like you need every paid add-on to have a good trip. A calm pace, good timing, and realistic expectations often matter more than a packed attraction list.

    For the most current attraction and queue details, use Disney’s guide to accessing attractions and queues before your Walt Disney World visit. Disneyland guests should review the Disneyland attraction accessibility guide.

    Other Disney Accessibility Options That May Help

    The Disability Access Service is only one of several supports available at Disney parks. While many guests use DAS to manage their experience, others may find that different disability policies and accommodations are all they need for a successful trip.

    Guests who use a wheelchair or ECV can often remain in their mobility device through much of the attraction queues. Some rides require a transfer into the ride vehicle. Disney provides detailed information about these transfer requirements, including whether a guest must be able to walk independently or transfer with help from their own party.

    If you are planning to use a wheelchair or a mobility scooter, reserve your equipment early during busy travel periods. While Disney offers rentals at the parks, availability is limited. ECV rentals from third-party companies can deliver equipment directly to many Walt Disney World area hotels, which is often helpful for navigating resort transportation and ensuring you have support for full-day use.

    Service animals are welcome in Disney parks. Disney lists relief areas and provides specific details about how service animals are handled at various rides. Read Disney’s service animal guidelines before your arrival if this applies to your travel plans.

    Guests with food allergies or dietary restrictions can speak with restaurant staff, review menus in the Disney app, and contact Disney in advance for specific needs. Table-service restaurants may offer a calmer meal break than a quick-service location during peak lunch hours.

    For air travel, families who need added assistance may also want to review TSA Cares travel support. Contacting TSA Cares ahead of time can help you better understand airport screening options and disability policies before your travel day.

    Small Details That Make the Day Easier

    The best Disney accessibility plan often includes a few simple comforts. Pack familiar snacks if they are part of your routine. Bring water, cooling supplies, sensory tools, a change of clothes, backup phone chargers, and any items that help the guest regulate or rest.

    Choose your hotel location with care. Staying close to the theme park can make midday breaks more realistic. A nearby Disney Resort hotel may also reduce transportation stress, especially after fireworks or a long day on your feet. If you have on-the-ground questions about disability policies or need help locating nearby quiet zones and cooling areas, do not hesitate to reach out to the Guest Experience Team.

    Talk with your group before the trip. Decide who will manage the app, who carries supplies, and what you will do if one person needs to leave the park early. Caregivers should not have to solve every problem alone while standing in a crowded walkway.

    Most importantly, give yourself permission to change plans. You may decide to leave a line, skip a parade, return to the hotel, or call it a day earlier than expected if you cannot wait in line. Those choices do not make the vacation less successful.

    They make it fit your family.

    Frequently Asked Questions

    Is DAS guaranteed if I have a medical diagnosis?

    No, registration is not guaranteed for any guest. Disney reviews requests individually to determine if a guest is unable to wait in a conventional queue for an extended period, and a formal diagnosis does not automatically qualify you for the program.

    Can I use DAS to skip the line entirely?

    DAS is not a front-of-the-line pass and does not provide immediate ride access. It allows eligible guests to wait for an attraction outside of the physical queue, providing a more manageable experience that aligns with their specific needs.

    Do I need to provide medical documentation to register?

    Disney does not require medical documentation or a detailed health history during the registration process. Instead, you will have a conversation with a Cast Member about the guest’s specific needs and why they struggle to wait in a traditional queue environment.

    Can my entire travel party use the DAS return time?

    Generally, the DAS guest and up to three additional party members may utilize the return time together for a total of four people. If you are traveling with a larger immediate family, be sure to discuss your specific group size with the Cast Member during your registration conversation.

    A Disney Trip That Fits Your Family

    The Disney Disability Access Service can make attraction waiting more manageable for eligible guests, but it is only one component of a comfortable vacation. Honest registration, a flexible schedule, and the right support tools matter just as much.

    Be sure to review the official disability policies on the Disney website before you travel. Once you have confirmed the current requirements, you can build your park days around what your traveler needs most. Using the DAS system alongside a well-paced Disney plan leaves room for rides, rest, familiar routines, and the memories your family came to make during your theme park vacation.

  • Disney World Rider Switch: Less Waiting for Families

    Disney World Rider Switch: Less Waiting for Families

    A baby falls asleep just as your older child reaches the front of the line. A toddler measures one inch too short for a coaster. These moments are common at the parks, and many parents search for a child swap option to handle these situations without missing out on the fun. Disney World Rider Switch is the perfect solution, allowing your family to experience every attraction without giving up your favorite rides.

    The Rider Switch program is a free service that lets adults take turns riding while someone stays back with the non-rider. By utilizing the Disney World Rider Switch, you avoid the difficult choice between missing a thrill ride or dragging an unhappy child through a long queue.

    A little planning makes this process feel simple once you arrive at the park.

    Key Takeaways

    • Disney World Rider Switch is available when a guest does not meet an attraction’s boarding requirements or chooses not to ride.
    • Your family should speak with a Cast Member at the attraction entrance before joining the line to ensure you are properly set up.
    • The first group waits in the standby line or uses its booked return method, while the waiting adult rides afterward with up to three guests.
    • Rider Switch is separate from Disability Access Service, also called DAS.
    • Attraction procedures can change, so confirm the current process with Cast Members at every ride.

    How Disney World Rider Switch Works

    Disney World Rider Switch is designed for families with young children, guests who do not meet a height requirement, and anyone who prefers not to experience a specific attraction. There is no extra charge for the Rider Switch program.

    The system works best when there are at least two adults in your travel party. One adult rides first while the other waits with the child or non-riding guest. After the first group finishes, the waiting party can take their turn.

    The key is to ask for Disney World Rider Switch before anyone enters the queue. Bring your entire party to the attraction entrance and tell the Cast Member who will ride first and who will wait.

    Cast Members will explain the current process and assign the return access needed for the second group. In many cases, the waiting party can return with up to three guests. That may include an older child who rode with the first adult and wants to ride again.

    Disney World Rider Switch does not mean everyone rides at the same time. It gives the second adult a chance to ride without needing to wait in the full standby line.

    The waiting party will wait outside the queue, which is a great time for a restroom break, a snack, a calm ride nearby, or a few minutes in the shade. While relaxing, you can check the My Disney Experience app to monitor updated wait times for other attractions. Keep an eye on the time, though, as your group should be ready when it is time for the second adult to return.

    Disney can change eligibility, return windows, and queue instructions by attraction. Review Disney’s official Rider Switch details before your trip, then follow the directions you receive in the park.

    Using Rider Switch at the Attraction Entrance

    The process is easy, but the order matters. A quick conversation with a Cast Member at the attraction entrance can save your family from standing in the wrong line or missing a return window.

    1. Choose your first riding group. One adult rides with any guests who meet the boarding rules and want to go first. The other adult stays with the non-rider.
    2. Bring the full party to the entrance. Let the Cast Member know you would like to use Rider Switch. Don’t send the first group into the attraction queue before you ask.
    3. Follow the Cast Member’s instructions. When you scan tickets or MagicBands, the system creates a digital Rider Switch pass. The exact setup may vary, but the return access is typically linked to the eligible guest’s account.
    4. Let the first group ride. They enter the standby line or use their Lightning Lane selection. Rider Switch does not remove the wait time for the first group.
    5. Return with the second group. When the first group is finished, the waiting adult can use the Rider Switch pass to return with up to two eligible guests.

    If you use Lightning Lane Multi Pass or Lightning Lane Single Pass, plan carefully. The first riding group still needs the proper selection for each person who rides. Rider Switch provides the waiting adult with a separate opportunity afterward, but it is not a replacement for a valid Lightning Lane booking.

    Be aware that an attraction entrance might have specific rules for rides using a Virtual Queue, such as TRON Lightcycle Run or Guardians of the Galaxy: Cosmic Rewind. A Cast Member may give different instructions for these experiences or attractions with unique queue setups. Always ask for clarification at that specific location instead of relying on general advice you heard earlier in the day.

    Rides Families Often Use Rider Switch For

    Navigating Disney World height requirements is one of the most common reasons families utilize the Rider Switch service. Often, a child may be excited to visit the park but is not yet tall enough for a major attraction. Using this service ensures that adults and taller siblings do not have to miss out on the thrills.

    Here are a few popular examples of attractions where families frequently use this option. Because specific Disney World height requirements can change periodically, always check the official Walt Disney World website before your visit.

    ParkAttractions families often ask aboutMinimum height
    Magic KingdomTRON Lightcycle / Run, Space Mountain, Seven Dwarfs Mine Train48 inches, 44 inches, 38 inches
    EPCOTGuardians of the Galaxy: Cosmic Rewind, Soarin’ Around the World42 inches, 40 inches
    Disney’s Hollywood StudiosSlinky Dog Dash, Rise of the Resistance, Tower of Terror38 inches, 40 inches, 40 inches
    Disney’s Animal KingdomAvatar Flight of Passage, Expedition Everest, Kali River Rapids44 inches, 44 inches, 38 inches

    A child who meets the height requirements can still choose not to ride if they are nervous. Dark rides, loud effects, sudden drops, and fast motion can feel overwhelming for some young guests. Rider Switch remains a perfect solution when a guest decides they do not want to board, regardless of whether they meet the posted limit.

    Please do not promise a child they can ride until they pass the official measurement at the attraction entrance. Cast Members always make the final call, and these safety checks are essential for ensuring that all height requirements are followed to keep every guest safe during their Disney vacation.

    Rider Switch and DAS Are Not the Same Service

    Disney World Rider Switch is designed for parties that include a guest who cannot or does not want to ride. It does not require advance registration, a disability qualification, or any medical discussion.

    Disability Access Service, or DAS, is a completely different program. Disney’s Disability Access Service is intended for guests who, because of a developmental disability such as autism, are unable to wait in a conventional queue for an extended period.

    Rather than waiting in the regular line, DAS provides a return time for the guest and their party. It is important to note that using DAS does not automatically mean a family needs to use Disney World Rider Switch, and using Rider Switch does not automatically qualify a guest for DAS.

    Some families may find it helpful to use both services when appropriate. For example, a guest registered for DAS may also have a younger sibling who does not meet the height requirement for an attraction. If you have questions about which services your group needs, speak with Guest Relations or a friendly Cast Member. They are there to explain the current options and help determine which policies apply to your party.

    Plan the Day Around Your Youngest Traveler

    Disney World Rider Switch works best when it fits into a relaxed family plan. Do not build your entire morning around thrill rides while your youngest child waits nearby. Instead, start with attractions the whole family can enjoy together to keep everyone happy.

    Magic Kingdom offers many excellent choices for this approach, including it is a small world, Dumbo the Flying Elephant, The Many Adventures of Winnie the Pooh, and the Walt Disney World Railroad. At EPCOT, areas such as Journey of Water, Inspired by Moana can offer a welcome break between bigger attractions.

    When it is time for a height-restricted ride, you should decide where the waiting party will go. While the first group rides, the party waiting outside the queue can explore nearby shops or find a comfortable spot to rest. You can use the My Disney Experience app to find nearby low-wait attractions or check Seven Dwarfs Mine Train wait times if you are currently at Magic Kingdom. A nearby snack location, a playground area, or a gentle attraction can make the split feel like part of the fun.

    Bring the basics with you to ensure comfort during the transition. Water, a familiar snack, diapers, wipes, and a stroller fan can make a short wait much easier for your little one. Walt Disney World also provides Baby Care Centers in all four theme parks for feeding, changing, and quiet time, making the entire Disney World Rider Switch process much smoother for families.

    Common Rider Switch Mistakes to Avoid

    The biggest mistake is joining an attraction queue without asking for guidance first. Always stop at the attraction entrance, gather your entire party, and speak directly to a Cast Member. They will verify your eligibility and explain the current procedure for that specific ride.

    Another common issue is failing to coordinate your groups before reaching the attraction entrance. Decide which adults are riding first and second to ensure a smooth transition. While some siblings might hope to ride twice, remember that the Rider Switch pass has specific limits intended to keep operations fair. Discuss these plans early so older children know what to expect.

    Avoid treating this service as a shortcut to skip every wait. The first group must still endure the standby line, as Rider Switch is designed specifically to allow the second adult a fair chance to experience the attraction after caring for a non-riding child.

    Finally, do not assume the instructions from one location apply to every ride in the park. Factors like staffing, attraction design, and queue operations can change the process. A Cast Member at the specific location you are visiting will always have the most current and accurate directions to help your family navigate the day.

    Frequently Asked Questions

    Do I need to register for Rider Switch in advance?

    No, there is no advance registration or paperwork required for the Rider Switch service. Simply approach a Cast Member at the entrance of the attraction with your entire group before entering the line to request the service.

    Can my older child ride with both parents?

    Yes, in many cases the first group can include an older child who meets the height requirement, and they may be allowed to ride again with the second adult. Be sure to confirm the current allowance with the Cast Member at the attraction entrance as policies can vary.

    Does Rider Switch allow me to skip the wait for the first group?

    No, the first group must still wait in the standby line or use their booked Lightning Lane return time. The Rider Switch service is designed to ensure the second adult does not have to wait in the full line after they finish supervising the non-riding guest.

    Can I use Rider Switch for any ride in the park?

    Rider Switch is intended for attractions with height requirements or those where a guest chooses not to participate. While it is widely available for thrill rides, you should always verify with a Cast Member at the specific ride entrance to see if the service is currently being offered.

    A Calmer Way to Share the Disney Day

    Disney World Rider Switch offers families much-needed flexibility when not everyone meets the height requirements for a specific attraction. By utilizing the Rider Switch pass, one adult can wait comfortably with a young child while the other enjoys the ride, ensuring that restrictive height requirements do not have to ruin the trip or prevent anyone from experiencing their favorite attractions.

    The simple habit that matters most is checking in with a Cast Member before you enter the queue. This process effectively streamlines your park day, allowing you to coordinate your Lightning Lane selections and park itinerary with ease. With clear plans, patient pacing, and the helpful support of Disney World Rider Switch, you can ensure that a single height restriction does not disrupt a full day of magical Disney memories for your family.

  • How to Plan a Disney Rest Day With Kids

    How to Plan a Disney Rest Day With Kids

    A Disney trip can feel like a sprint in mouse ears. Kids wake up excited, parents push to make the most of it, and by day three everyone is a little fried.

    That is why a Disney rest day matters. Including this downtime as a vital part of your Disney vacation planning gives kids time to reset, helps parents catch up on real life basics, and often makes the next park day better, not smaller. The goal is not to do nothing. The goal is to stop running.

    Key Takeaways

    • Schedule your mid-week break after two or three park days, rather than waiting until everyone is already melting down.
    • Keep the day simple, with sleep, pool time, easy meals, and at most, one light resort activity to enjoy.
    • Plan differently for Disneyland and Walt Disney World, because distance and transportation requirements change what a true rest day looks like.
    • Use the day for laundry, grocery delivery, and a packing reset so the next morning feels much easier.
    • Match the pace of the day to your child’s age, energy level, and sensory needs.

    Why kids do better with a rest day at Disney

    Children do not measure a vacation by ride count. They measure it by how they felt. If your child was tired, hungry, overheated, and rushed, the trip will not feel magical regardless of how many Genie+ stacking strategies you utilized during your park days.

    A rest day fixes that before it leads to a full vacation meltdown. Toddlers need naps and quiet, and younger kids need room to play without waiting in a long line. Tweens may not nap, but they still hit a wall after long days, late fireworks, and too much walking. A family with young children especially benefits from this slower pace, as it helps prevent the exhaustion that often leads to tears and frustration.

    Parents need the break too. A Disney vacation asks a lot from grown-ups. You are waking up early, monitoring wait times, carrying bags, ordering food, and keeping everyone moving. Furthermore, managing your park reservations ahead of time can help you avoid morning stress, while a slower day gives you the necessary space to breathe and catch up.

    If you are wondering whether a rest day is worth it, think about the next park day. Rested kids usually enjoy more and complain less.

    This is not only for long trips, either. Even a four or five-night stay can benefit from a lighter day. Many families planning a first trip find that spacing out park days makes the whole vacation feel better, as noted in this first Disney World family trip planning guide.

    Pick the right day before you leave home

    The best non-park day usually lands in the middle of your trip. For many families, that means after two park days. If you wait until everyone is already worn down, the break comes too late to be effective.

    Start by considering your kids’ normal pace at home. Does your toddler still nap every day? Does your 7-year-old get cranky by late afternoon? Does your tween stay up fine but sleep in hard the next morning? Build your itinerary around those habits rather than the idea of getting your money’s worth.

    Trip length matters, too. On a shorter Disneyland trip, a full day away from the parks may not fit your schedule, so a half-day break can be enough. On a longer Walt Disney World vacation, a full day off often helps more because the Walt Disney World resort itself is part of the experience.

    This quick comparison helps set the right expectation:

    Trip styleDisneylandWalt Disney World
    Resort sizeCompact, walkable areaLarge property, more transit time
    Best break optionMidday hotel break or half rest dayFull resort day often works better
    Good timingAfter 1 to 2 park daysAfter 2 to 3 park days
    Easy non-park planPool, nap, Downtown DisneyPool, nap, Disney Springs, water parks

    The big takeaway is simple. Disneyland rest days are often shorter and more flexible. Walt Disney World rest days usually need to be intentional because getting back and forth takes more time. For families with older kids or teenagers, visiting the water parks is a fantastic way to keep the energy up without the intensity of a full theme park day.

    You can see the same thinking in this park days vs rest days discussion, where families talk about putting a break in the middle instead of pushing straight through.

    What a good Disney rest day actually looks like

    A good rest day isn’t packed with backup fun. That is the common trap many parents fall into. If you fill your schedule with a character breakfast, shopping, mini golf, and a late dinner, you have essentially built another full park day rather than a break.

    Keep it light. Sleep in. Eat breakfast in the room. Let kids watch a show in pajamas for a bit. Head to the pool when they are ready, not when the schedule says so.

    An adult woman sits with her two children on cushioned lounge chairs by a bright blue pool. Tall palm trees surround the area under a clear sky with vibrant cyan accents.

    Pool time is often the easiest win for families. It feels like a real vacation, helps kids burn off energy, and doesn’t demand much planning from anyone. If your child loves the water, that may be enough activity to keep them happy for the entire day.

    Then, build in true downtime. Go back to the room for lunch, naps, or quiet time. Even kids who say they don’t need a rest usually settle down when the room is cool and the curtains are closed. Give tweens headphones, a book, a handheld game, or time to scroll and recharge.

    Meals should be easy. This is not the day to chase the hardest reservation or navigate a crowded character breakfast. A quick-service lunch, grocery snacks, or simple food in the room works much better. Many families order basics like bananas, bagels, yogurt, crackers, and water through services such as Instacart or Walmart before arrival. Check your hotel’s current grocery delivery policy first.

    For a light outing, choose just one thing. At Walt Disney World, you might try resort hopping to visit the Disney monorail resorts, or head to locations like Animal Kingdom Lodge or Fort Wilderness to see the animals and horses. If you are staying on-site, look for movies under the stars if your hotel offers them. At Disneyland, Downtown Disney is an easy option because everything is close together. Keep the outing short enough that it still feels like a genuine break from the theme park pace.

    Rest day ideas for toddlers, younger kids, and tweens

    Toddlers need rhythm more than variety

    Toddlers usually do best when the day looks familiar. Sleep a little later, eat breakfast in the room, splash in the pool, nap, and maybe take a relaxing stroller walk in the evening.

    Don’t overschedule a toddler rest day. One simple activity is plenty. If your child is sensitive to noise or crowds, the quiet of your room may be the best part of the day. Families staying at a deluxe resort often find that these properties offer quieter, more secluded resort activities that are perfect for maintaining a toddler’s nap schedule.

    Younger kids need play and food at the right time

    Kids in the 5 to 9 range often want to keep going until they suddenly don’t. A rest day helps you stay ahead of that total crash.

    Pool time, a playground, coloring in the room, or a fun ice cream break can feel exciting without being exhausting. If you want a change of scenery that remains low-key, taking a stroll along the Disney BoardWalk is a fantastic way to enjoy the atmosphere without the intensity of a theme park. Keep snacks close by throughout the day. Tired kids fall apart faster when they are hungry, and long Disney days often make that behavior much worse.

    Tweens want a break, even if they won’t say it

    Tweens may act like they are fine, but long lines, high heat, and constant family motion wear them down too. Give them a little control over the slower day.

    That might mean sleeping in, choosing the restaurant for lunch, swimming longer, or having an hour alone in the room while an adult stays nearby. Some tweens enjoy a low-key evening trip to Disney Springs more than another early rope drop. Even if they claim they have endless energy, they will appreciate the chance to recharge their batteries away from the crowds.

    Use the day for the boring stuff that helps later

    A Disney rest day is the best time to handle small tasks that make the rest of the trip smoother. Laundry is the big one. Most guests staying at a Walt Disney World resort have access to convenient laundry facilities, so running even one load can save suitcase space, cut down on packing stress, and give you fresh clothes before the next park morning.

    This non-park day is also the right time to reset your park bag. Toss the trash, refill sunscreen, and charge your battery packs. Take a moment to restock wipes, ponchos, and snacks. If your family uses cooling towels, stroller fans, noise-reducing headphones, or medication, check all of it now.

    Think about the next morning too. You might want to mobile order a simple breakfast if that helps your morning routine. Lay out clothes before bed to save time. If your child does better with a set schedule, talk through the next day at dinner so the transition back to park pace feels calm.

    Parents of children with sensory or mobility needs may want even more structure on a rest day. Keep meals and quiet time close to the same hour. Limit surprise changes. If the hotel room is your child’s safe place, protect that time instead of trying to squeeze in one more activity.

    A slower day should make tomorrow easier. If it does not, the day was still too full.

    Keep expectations low, and you’ll usually get more from the day

    The biggest mistake families make is treating a rest day like a park day without rides. That turns a recovery day into another high-pressure performance.

    Set one or two priorities and let the rest go. Maybe your whole plan is just pool time, pizza, laundry, and an early bedtime. That is enough. In many cases, that is perfect.

    It is also okay if the day changes. Your toddler might nap longer than expected, your tween might want to skip the pool, or rain might cancel the one outing you planned. Flexibility matters more than sticking to a rigid schedule. For instance, skipping the Magic Kingdom fireworks for one night can lead to significantly better moods the next day. If your kids still want a touch of magic without the stress of park crowds, consider watching the show from a distance, such as the beach at the Polynesian Village Resort.

    If you want a Disney trip that feels good for the whole family, protect your energy the way you protect dining reservations. Kids do not need every minute filled. They need space to enjoy what you are already giving them.

    Frequently Asked Questions

    Do I need to schedule my rest day in advance?

    Yes, it is best to build your rest day into your itinerary before you leave home rather than waiting until everyone is already exhausted. Scheduling it after two or three park days helps you stay ahead of potential meltdowns and ensures you have a relaxed block of time already accounted for in your travel plans.

    Can I do a rest day if I have a short trip?

    Absolutely, though your approach might look different than a longer vacation. If you only have a few days, consider a half-day break that includes a morning sleep-in or an afternoon by the pool, which can still provide enough recovery to improve your park experience without sacrificing too much time.

    What are some low-energy activities for a rest day?

    Stick to simple, relaxing options like swimming at your resort pool, visiting Disney Springs, or doing a load of laundry to simplify your packing. Avoid over-scheduling with complex outings or difficult dining reservations, as the goal is to keep the pace slow and allow the entire family to recharge.

    Is it okay if my plans change during my rest day?

    Flexibility is actually the most important part of a successful rest day. If your child naps longer than expected or a rain shower moves in, don’t feel pressured to force your planned activities; the best rest day is one that allows your family to decompress at their own speed.

    Conclusion

    A well-planned Disney rest day is one of the most effective strategies to keep a family trip from tipping into total exhaustion. In fact, comprehensive Disney vacation planning should always include scheduled downtime to ensure your group stays energized for the magic ahead. When you prioritize extra sleep, relaxed meals, pool time, and a little breathing room, children usually bounce back much faster.

    The best plan is the one that matches your family rather than the one that looks the busiest on paper. A calmer day in the middle of your trip often leads to more enjoyable park visits, better moods, and a vacation that feels truly refreshing while you are living it.

  • Honeymoon Itinerary Example for Seven Days

    Honeymoon Itinerary Example for Seven Days

    The fastest way to ruin a honeymoon is to treat it like a race. If every hour is scheduled, every dinner is a must-book event, and every day starts before sunrise, even the most beautiful destination can feel like work. A smart honeymoon itinerary example for seven days should give you structure without stealing the reason you booked the trip in the first place – time together.

    For most couples, seven days is the sweet spot. It is long enough to feel like a real escape, but short enough that every decision matters. You need enough planned to avoid wasting precious time figuring things out on the spot, yet enough breathing room to enjoy the surprise moments that make a honeymoon memorable.

    This sample itinerary is built for that middle ground. It works especially well for beach destinations, island resorts, and romantic cities where you want a mix of relaxation, one or two signature experiences, and easy logistics. You can tailor the details to your budget, destination, and travel style, but the rhythm is what matters.

    A honeymoon itinerary example for seven days that actually feels good

    The best seven-day honeymoon does not try to fit everything in. It creates a natural flow: arrival and recovery, connection and exploration, one or two standout moments, then a gentle landing before travel home. That pacing matters more than people think.

    A lot of couples make the same mistake. They front-load the trip with tours, dinner reservations, and early wake-ups because they want to make the most of every day. By day four, they are tired, behind schedule, and skipping the very experiences they were excited about. A better plan is to build the week around energy levels, not just a wish list.

    Day 1: Travel and settle in

    Your first day should be light on expectations. Even if your flight is short, wedding fatigue is real. If you are coming off a packed weekend of events, you will likely be more tired than you expect.

    Plan for arrival, check-in, a relaxed meal, and an early evening. If your room has a balcony, ocean view, plunge pool, or any kind of private outdoor space, use it. Order drinks, take a breath, and let the trip begin slowly. If you can schedule one nice touch for arrival day, make it simple – maybe a sunset dinner at the resort or a couples massage in the evening.

    This is not the day for a long excursion. The win is feeling grounded and excited, not productive.

    Day 2: Easy exploration

    Day two is a good time to get familiar with the destination without committing to anything too ambitious. Sleep in, enjoy breakfast, and then choose one low-pressure activity. That might be walking a nearby historic district, relaxing on the beach, visiting a local market, or taking a short scenic boat ride.

    Keep lunch casual and leave the afternoon open. If you are staying at a resort, this is a great day to actually enjoy it. Many couples pay for amenities they barely use because they spend every day off-property.

    For dinner, book something slightly special but not your biggest romantic meal of the week. Think candlelit and memorable, but still easy. You are still settling into the pace of the trip.

    Day 3: Your signature experience

    This is the day to schedule one of the experiences you will remember years from now. Depending on the destination, that could be a catamaran cruise, a guided food tour, a private beach picnic, horseback riding, a wine tasting, or a waterfall excursion.

    Put your higher-energy activity here because by day three, most couples feel rested enough to enjoy it. You are no longer in travel mode, and you have not yet reached the point in the week where fatigue starts to creep back in.

    If the signature experience takes most of the day, keep the evening simple. Room service, a nightcap, and an early return to the room can be more romantic than forcing one more event onto the calendar.

    Day 4: Slow day, by design

    Every good honeymoon itinerary needs a recovery day, and day four is usually the right place for it. This is where many couples are tempted to add another excursion because they feel they should be doing more. Resist that urge.

    Use this day for pool time, spa treatments, a long lunch, naps, reading by the water, or nowhere-to-be time together. If you want one activity, choose something short and easy, like a beach walk at sunrise or a one-hour paddleboard session.

    This slower day is not filler. It is often the day couples talk about most fondly because it gives them time to actually enjoy each other without a schedule running the show.

    How to adjust this seven-day honeymoon itinerary to your style

    Not every couple defines romance the same way. Some want quiet luxury and downtime. Others want culture, nightlife, and movement. The framework stays the same, but the details can shift.

    If you are a beach couple, keep two full relaxation blocks in the week and limit off-site tours. If you are heading to a city like Paris, Rome, or New York, you may swap pool time for café mornings, museum visits, and neighborhood wandering. If adventure is a big part of your relationship, you can upgrade day three into something bigger, like hiking, snorkeling, or a full-day guided trip, but you still need a slower day afterward.

    Budget matters too. A seven-day honeymoon does not need to mean seven expensive dinners and private excursions every day. In fact, overspending early in the week often creates stress later. A better approach is to splurge on two or three anchor moments and keep the rest comfortably paced. That might mean one luxury dinner, one premium excursion, and one upgraded room feature, while breakfasts, lunches, and some activities stay simple.

    Day 5: One meaningful outing and one romantic evening

    By day five, you are usually fully in vacation mode. This is a great day for a half-day outing followed by a more polished evening. You have enough energy to enjoy both, and the trip still feels full of possibility.

    Choose an outing that fits your destination without requiring military-level timing. A cooking class, snorkeling trip, vineyard visit, or guided cultural tour works well here. Try to end by mid-afternoon so you have time to relax and get ready for dinner.

    Make dinner count on this night. If you want a private dinner, chef’s table experience, rooftop reservation, or sunset meal on the sand, this is a smart spot for it. You are settled in, comfortable, and not rushing to fit everything in before checkout.

    Day 6: Flexible favorite day

    Day six should stay flexible. Some couples use it to revisit what they loved most – one more beach day, one more walk through town, one more swim before lunch. Others save space here for an activity they could not confidently book in advance because of weather or energy levels.

    That flexibility is valuable. It keeps the itinerary from feeling overly rigid and gives you room to respond to the trip as it unfolds. Maybe you discover a beach club you want to return to. Maybe you decide to skip another tour and just sleep late. That is not bad planning. That is good planning.

    If you want to shop for souvenirs or capture a few honeymoon photos, this is a good day for it. There is less pressure, and you are not trying to squeeze errands into departure day.

    Day 7: Departure without chaos

    Departure day should be clean and calm. Do not schedule anything that depends on perfect timing. Enjoy breakfast, take a final walk, pack without rushing, and leave space for transportation delays or airport lines.

    If your flight is later in the day, ask about late checkout, luggage storage, or access to resort amenities after checkout. Those small details can make the last day feel like part of the honeymoon instead of a stressful travel day.

    A strong ending matters. The goal is to leave feeling connected and refreshed, not irritated because the final morning turned into a scramble.

    What makes a seven-day honeymoon work better than a packed schedule

    The strongest itinerary is not the one with the most bookings. It is the one that protects your energy, matches your budget, and fits the kind of memories you actually want to make.

    That means being honest about your pace as a couple. If one of you loves activity and the other wants rest, the itinerary needs both. If food matters more to you than excursions, shift your budget there. If your destination requires a lot of transit between experiences, plan fewer of them. Travel always looks easier on paper than it feels in real life.

    This is also where expert planning can save a lot of frustration. Couples often underestimate transfer times, restaurant timing, entry requirements, and how quickly small logistics can chip away at a romantic trip. At K&S The Travel Crusaders, we see it all the time – great destinations made better by smart pacing and realistic planning.

    A honeymoon should feel personal, not copied and pasted from someone else’s vacation. Use this honeymoon itinerary example for seven days as a framework, then shape it around what the two of you love most. The best trip is not the busiest one. It is the one that leaves you thinking, we would do that again in a heartbeat.

  • When to Book Corporate Retreat Travel

    When to Book Corporate Retreat Travel

    Planning a company retreat two months before departure can feel manageable right up until flights spike, the best room blocks disappear, and your ideal meeting space is suddenly gone. If you’re wondering when to book corporate retreat travel, the short answer is earlier than most teams think – but the real answer depends on your group size, destination, and retreat goals.

    Corporate retreat travel is one of those projects where timing affects almost everything. Book too late, and you may end up compromising on cost, convenience, or experience. Book too early without a clear plan, and you risk change fees, confusion, or paying deposits on details that were never fully approved. The sweet spot is not the same for every company, which is why a planning-first approach matters.

    When to book corporate retreat travel for the best results

    For most corporate retreats, booking travel and core trip components six to nine months in advance is a smart target. That window usually gives you better flight availability, more hotel and meeting space choices, and enough time to coordinate approvals, dietary needs, and team schedules without rushing.

    If your retreat involves 10 to 25 travelers, domestic flights, and a straightforward hotel stay, six months is often enough. If you’re moving a larger group, traveling during peak season, heading to a resort destination, or adding activities and off-site events, aim for eight to 12 months.

    There are exceptions. A small leadership retreat in a major city during an off-peak month may come together in three to four months. A company-wide retreat to a beach destination during spring break season may need nearly a year of lead time to avoid limited inventory and premium pricing. Timing is always tied to complexity.

    Why booking early matters more for group travel

    A corporate retreat is not just a flight and hotel reservation. You’re balancing group air, room blocks, transfers, meeting space, meal functions, and often the personal preferences of people who are not used to traveling together. That is where lead time becomes your biggest advantage.

    Early booking protects choice. It gives you access to better flight schedules, more convenient arrival windows, and hotels that can actually accommodate both sleeping rooms and productive meeting space. If your retreat has a team-building component, welcome dinner, or branded experience, earlier planning also means more vendor availability.

    It can also protect the budget. Group rates are not magic discounts that appear at the last minute. In many cases, the best value comes from booking while there is still enough inventory to negotiate from. Once demand rises, your options shrink and suppliers have less reason to be flexible.

    There is another benefit that often gets overlooked – internal confidence. When leadership, HR, or operations teams see a retreat timeline that is organized well in advance, approvals tend to move faster. Clear planning makes the whole trip feel more manageable.

    The timing depends on your retreat type

    Not every retreat follows the same booking timeline. A sales kickoff, executive off-site, wellness retreat, and reward trip all have different planning pressure points.

    Executive retreats are usually smaller, but expectations are higher. Travelers may want premium flight times, upgraded accommodations, and quiet meeting environments. Even with fewer attendees, these trips benefit from early booking because quality matters more than simply finding enough space.

    Company-wide retreats require the longest runway. The more people involved, the more likely it is that schedules, budgets, and traveler details will shift. Starting early gives you room to gather information without creating chaos.

    Incentive-style retreats often need strong destination appeal. If the experience is part of the reward, the property and location matter a lot. Those trips should be booked earlier, especially if the destination is seasonal or resort-based.

    Simple training retreats or regional team gatherings can often be booked on a shorter timeline, provided the destination is easy to access and the agenda is not heavily layered with events.

    How seasons affect when to book corporate retreat travel

    Season can change your timeline by months.

    If your team wants to travel during spring break, summer vacation, major conference periods, or holiday-adjacent weeks, book early. Those dates bring heavier demand from both leisure and business travelers. Flights fill faster, hotel rates rise, and even ground transportation can become harder to secure.

    Resort destinations need special attention. Beach properties, mountain lodges, and warm-weather escapes often have very clear high seasons. A January retreat in the Caribbean or a fall retreat at a popular luxury resort will usually need much more lead time than a midweek business hotel stay in a city with steady inventory.

    Shoulder season can be a great option for companies that want strong value without sacrificing experience. If your schedule is flexible, you may get better rates and more choices by moving your retreat slightly outside the busiest travel windows.

    Signs you’re booking too late

    Sometimes the calendar tells the story. Sometimes the warning signs show up in the details.

    If flights are already forcing split arrivals, if hotels can offer rooms but not meeting space, or if your preferred destination suddenly only has premium inventory left, you are likely in the late stage of the booking cycle. Another red flag is when every decision starts to feel reactive. Instead of choosing what fits your team, you’re taking whatever is still available.

    Late booking also tends to create hidden costs. A cheaper hotel farther from the airport may look fine at first, but added transfer costs and lost time can change the math quickly. The same goes for inconvenient flight schedules that cut into your meeting agenda or leave travelers arriving exhausted.

    What to lock in first

    When you’re planning a retreat, not every detail needs to be finalized on day one. A smart booking sequence keeps the process moving without creating unnecessary pressure.

    Start with the retreat dates, destination shortlist, and estimated headcount. Once those three pieces are in place, secure the hotel or resort and any meeting space that is essential to the event. After that, focus on air travel, airport transfers, and rooming needs.

    Activities, special dining, and smaller enhancements can follow. The key is to lock in the components that are hardest to replace. A private dinner is easier to adjust than a sold-out property that can no longer hold your group.

    This is where expert guidance helps. K&S The Travel Crusaders works from a planning-first mindset because organized sequencing saves time and reduces the chance of expensive changes later.

    A practical booking timeline to use

    If you want a realistic benchmark, think in phases instead of one giant deadline.

    At nine to 12 months out, define the purpose of the retreat, estimate budget, and narrow dates and destinations. This is also the right time to identify decision-makers and approval steps.

    At six to nine months, secure the property, meeting needs, and group travel framework. For larger or more complex trips, this is when the retreat really gets built.

    At three to six months, collect traveler details, finalize flight arrangements, confirm transfers, and shape the on-site schedule. This is also the window for meal planning, team activities, and special requests.

    Inside 90 days, the focus shifts from shopping to execution. Final counts, rooming lists, traveler communication, and contingency planning should take priority.

    If you’re already within that 90-day window, the trip may still be possible, but flexibility becomes essential. You may need to adjust destination, budget, or travel dates to make it work well.

    The real answer is earlier than your stress level wants

    A lot of teams wait to book because they want every detail settled first. That instinct makes sense, but it often backfires. In retreat planning, you rarely get perfect clarity before you make the first decision. What you need is a strong framework, not total certainty.

    The best time to book is when you know the goal of the trip, the likely traveler count, and the budget range. Once those are in place, you can start holding the pieces that matter most. Waiting for every employee RSVP or every executive preference can cost more than it saves.

    Good retreat travel should feel intentional, not rushed. When you book with enough lead time, your team gets better options, a smoother travel experience, and more room to focus on why the retreat matters in the first place. If your company is talking seriously about dates, you’re probably closer to booking time than you think.

  • How to Coordinate School Chaperone Travel

    How to Coordinate School Chaperone Travel

    The first missed deadline on a school trip usually is not the flight. It is the chaperone paperwork, the rooming confusion, or the last-minute text asking who is riding with which students. If you are figuring out how to coordinate school chaperone travel, the real job is not just booking seats and hotel rooms. It is building a plan that keeps adults informed, students supervised, and the trip moving without constant scrambling.

    School travel has more moving parts than a typical group vacation because every decision touches safety, schedules, and accountability. A good chaperone plan protects the experience for everyone. It also protects the organizer from carrying every detail alone.

    Why school chaperone travel needs its own plan

    Chaperones are not just extra adults on the trip. They are part of the operating system. When their responsibilities are unclear, small issues spread fast. A late airport arrival becomes a check-in delay. A rooming mistake turns into a discipline problem. A missed medication handoff becomes a serious concern.

    That is why learning how to coordinate school chaperone travel starts with role clarity before any itinerary is finalized. Every adult needs to know what they are responsible for, what they are not responsible for, and who makes the final call when something changes.

    In most school groups, the best results come from treating chaperones like a managed team, not like volunteers who will simply figure it out. That does not mean making the process complicated. It means creating a structure that is simple enough to follow under pressure.

    Start with the right chaperone-to-student structure

    Before you look at flights, hotel blocks, or attraction tickets, set your supervision model. Your ideal ratio depends on student age, destination, and activity level. Middle school groups often need tighter oversight than high school groups. An overnight city trip requires a different setup than a daytime academic competition.

    This is also where trade-offs come in. More chaperones can mean stronger supervision, but too many adults can create communication problems if no one knows who is leading. Fewer chaperones may be easier to manage financially, but they can stretch coverage too thin during check-ins, meal periods, and free time.

    The smartest approach is to assign each chaperone a specific student group and keep those assignments consistent throughout the trip. That gives students a clear adult contact and reduces the chaos of everyone asking everyone else for help.

    How to coordinate school chaperone travel before booking

    The booking phase is where many school organizers get trapped in details. They start reserving flights or buses before confirming what the adults actually need. That is backwards.

    First, gather the basics from each chaperone early. You need legal name as it appears on ID, date of birth if required by the carrier, mobile number, emergency contact, and any accessibility or medical needs that affect travel. If the trip includes flights, build in time to verify IDs before tickets are issued. One name mismatch can trigger expensive changes later.

    Next, define what costs the school covers and what the chaperone covers. Do not assume everyone interprets the budget the same way. Spell out whether transportation, checked bags, meals, hotel incidentals, attraction tickets, and tips are included. A lot of travel stress has nothing to do with the trip itself. It comes from unclear expectations around money.

    Then confirm the supervision schedule before locking in the itinerary. If your day starts at 6:00 a.m. for a departure and ends with a late performance or event, adults need to know that in advance. Some chaperones are great with airport movement and head counts. Others are stronger with evening hotel supervision or student behavior support. Match assignments to strengths when you can.

    Build a communication plan that works in real time

    A school trip does not fail because people lacked information. It fails because the right information did not reach the right person fast enough.

    One trip leader should be the point person for final decisions. Under that person, each chaperone should oversee a small group of students. Everyone should know the reporting chain. If a student is late, sick, missing from the group, or needs parent contact, the chaperone should know exactly who to notify first.

    Keep your communication tools simple. A master group message for adults is useful for updates like gate changes, bus loading times, and meeting points. But student-specific issues should move through the assigned chaperone structure, not through a general thread where details get buried.

    Printed backups still matter. Phones die. Signals drop. Apps fail when you need them most. Every chaperone should carry a printed itinerary, hotel information, transportation details, student roster for their assigned group, emergency contacts, and any school protocol sheet.

    Rooming, transportation, and supervision need to align

    One of the most common mistakes in how to coordinate school chaperone travel is planning these three pieces separately. They should work together.

    If a chaperone is assigned to a set of students, place that adult near those students in the hotel whenever possible. If you are using buses, assign loading groups that match the supervision groups. If your itinerary includes walking transfers, museum visits, or meal breaks, keep the same adult-student grouping instead of reshuffling throughout the day.

    Consistency makes the trip safer and easier to manage. Students know who to check in with. Chaperones can notice patterns faster, whether that is a student who keeps falling behind or one who is not feeling well. It also reduces the mental load on the lead organizer because fewer moving parts need to be tracked at once.

    There are times when you may need to adjust this. For example, if one chaperone has mobility limitations, another adult may need to lead a walking-heavy activity. That is fine, as long as the shift is planned and communicated, not improvised on the sidewalk.

    Prepare chaperones for the parts no one talks about

    Most adults understand they are there to supervise. Fewer understand what that looks like in practice during travel days.

    Your pre-trip briefing should cover behavior expectations, medication procedures according to school policy, curfew enforcement, room checks, head counts, public conduct, and how to respond if a student separates from the group. It should also cover lower-profile issues like who carries extra copies of documents, who tracks meal attendance, and who handles early-morning wake-up checks.

    This is where confidence matters. Chaperones do better when they feel equipped, not just recruited. Give them scripts if needed. For instance, what should they say if a student refuses instructions, wants to leave the group, or contacts a parent directly during a discipline issue? Clear guidance keeps adults from freezing or overreacting.

    A short in-person or virtual training session before departure can save hours of confusion on the trip itself. That kind of preparation is one reason families and schools work with planning-focused partners like K&S The Travel Crusaders. Better trips usually come from better systems, not luck.

    Budget decisions affect chaperone performance

    It is tempting to cut costs around adult travel because the student experience feels like the priority. But some savings create new risks.

    For example, placing chaperones too far from student rooms may reduce room costs, but it weakens overnight supervision. Booking separate flights to chase lower fares may save money on paper, but it complicates airport management and arrival timing. Skipping one extra adult on a large trip may trim the budget, yet leave no margin when someone gets sick or a schedule changes.

    That does not mean every trip needs premium arrangements. It means every budget choice should be measured against function. Ask one simple question: does this save money without making supervision harder? If the answer is no, it may not be a real savings.

    Keep parents informed without putting them in the middle

    Parents want updates, and they should have confidence in the plan. At the same time, too many direct communication paths can create confusion during the trip.

    The best approach is to set expectations before departure. Let families know who the main school contact is, when updates will be shared, and how emergencies will be handled. Chaperones should not be fielding nonstop parent questions while moving students through an airport or checking everyone into a hotel.

    When the parent communication process is clear, chaperones can stay focused on the students in front of them. That makes the trip feel calmer for everyone.

    The goal is not perfection. It is control.

    School trips always have surprises. A delayed bus, a changed venue time, a student who forgot something important – that is normal. The difference between a stressful trip and a well-run one is whether your chaperone plan can absorb those surprises without falling apart.

    If you want to know how to coordinate school chaperone travel well, start by treating supervision as part of the travel design, not an afterthought. Assign clearly. Communicate simply. Book with the supervision plan in mind. When the adults feel prepared, students travel with more confidence, and the whole trip gets lighter to carry.

    The best school travel plans are the ones that let everyone focus less on fixing problems and more on why the trip mattered in the first place.

  • Disney Dining Plan Comparison Made Simple

    Disney Dining Plan Comparison Made Simple

    You can feel the budget pressure at Disney fast – especially once you start adding up breakfast in the park, a character meal, a late-night snack, and that must-have Mickey bar. A smart Disney dining plan comparison helps you figure out whether prepaying for meals will actually save money or just make vacation spending feel easier.

    For most travelers, that distinction matters. Some families want every major cost settled before they leave home. Some couples care more about flexibility than squeezing every dollar. And if you are coordinating a bigger trip with grandparents, kids, or multiple rooms, food planning can become one of the biggest stress points unless you sort it out early.

    What a Disney dining plan comparison really needs to cover

    A lot of dining plan advice stops at credit counts, but that is only part of the decision. The better question is how your group actually eats. Do you want grab-and-go meals so you can maximize ride time, or do you picture sit-down dinners as part of the experience? Are your kids adventurous eaters, or are you going to end up chasing familiar options and simple meals?

    In most cases, comparing Disney dining plans comes down to four things: how many table-service meals you want, whether snacks are part of your daily rhythm, how much convenience matters to you, and whether your group is disciplined enough to use all the credits.

    If you will happily mobile order lunch, snack through the afternoon, and keep moving, a lighter plan tends to make more sense. If your vacation style includes character breakfasts, themed dinners, and a slower pace, the standard plan starts looking more attractive.

    Disney dining plan comparison: Quick-Service Plan vs Standard Plan

    The two most common options travelers compare are the Quick-Service Dining Plan and the standard Disney Dining Plan. Both prepay your meals, but they support very different vacation styles.

    Quick-Service Dining Plan

    This plan is usually the better fit for families who want simplicity without spending a lot of time on reservations. It generally includes two quick-service meals and one snack or nonalcoholic drink per person, per night of stay, plus a resort-refillable mug.

    Quick-service credits work well for guests who want flexibility. You can eat at food courts, many counter-service restaurants in the parks, and several casual resort dining spots. That means less time locked into dining reservations and more freedom to adjust your day.

    The trade-off is obvious. You give up most sit-down restaurant experiences, including many of the meals people remember most. If your ideal Disney day includes a character dinner or a themed restaurant where the meal itself is part of the event, the quick-service plan can feel limiting.

    Standard Disney Dining Plan

    The standard plan usually includes one quick-service meal, one table-service meal, one snack or nonalcoholic drink per person, per night of stay, plus the refillable mug. This is the plan many first-time visitors look at because it feels like the classic Disney vacation package.

    For travelers who want at least one reserved meal each day, this plan can be a strong fit. It works especially well for families wanting character dining, couples planning signature-feeling evenings without paying every meal out of pocket on the spot, and multi-generational groups who appreciate a scheduled break.

    The downside is that table-service dining takes time. A sit-down meal can easily take 60 to 90 minutes, sometimes longer. That is not automatically bad, but it is a real cost if your priority is rides, park hopping, or flexible afternoons.

    Who gets the best value from each plan

    The best plan is not always the one with the highest dollar value on paper. It is the one that matches how you already want to travel.

    Best for the Quick-Service Plan

    This plan usually makes the most sense for families with younger kids who do better with shorter meal stops, groups visiting for shorter trips, and travelers who are very park-focused. It can also be a strong pick for budget-conscious guests who like the predictability of prepaying but do not want to commit to table-service reservations every day.

    It is also helpful if your group is hard to pin down. School or sports groups, for example, often benefit from quicker meals and simpler coordination, even though Disney dining rules should always be checked against the exact group setup.

    Best for the Standard Plan

    The standard plan tends to work best for guests who already know they want table-service meals. Families planning character experiences often land here because those meals can be expensive if paid out of pocket. Couples celebrating an anniversary, honeymoon, or special trip may also prefer the built-in structure of one nicer meal a day.

    This plan can also reduce decision fatigue. When your meal is already accounted for, you are less likely to second-guess every restaurant price while standing in the park with tired kids and low phone battery.

    The biggest mistake people make in a Disney dining plan comparison

    They assume every credit is equal in value.

    It is not. Some quick-service meals are relatively inexpensive, while others offer a much better return. The same goes for table-service credits. If you use a table-service credit on a lower-priced meal when you could have used it at a more expensive character dining experience, the math changes.

    That does not mean you should chase value at every meal. Vacation should still feel fun. But it does mean the plan works best when you have at least a rough idea of where you want to eat.

    Another common issue is overestimating appetite. Disney portions can be substantial, and many guests do not eat three full meals a day in the heat. If your family typically shares food, skips breakfast, or leans toward light meals, a dining plan may give you more food than you need.

    Hidden factors that matter more than price

    A strong Disney dining plan comparison should include convenience, not just cost. Prepaid meals can make a trip feel smoother because the major food spending is already handled. For many families, that peace of mind is valuable on its own.

    There is also a psychological benefit. When meals are already built into the package, it becomes easier to say yes to experiences you might otherwise hesitate over, especially for first-time visitors who are unsure what typical Disney meal costs look like.

    Still, flexibility matters too. Dining plans are less useful if your group likes to leave the parks for off-site dining, split meals often, or keep every day open-ended. In those cases, paying out of pocket may fit better even if a plan looks appealing at first glance.

    How to choose the right plan for your trip

    Start with your priorities, not the brochure. If your top goal is convenience and predictable spending, either plan can help. If your top goal is maximizing ride time, lean toward quick service. If dining is part of the vacation experience, the standard plan deserves a serious look.

    Next, map out a realistic version of your day. Think about when your group actually eats, how patient everyone is with reservations, and whether one table-service meal per day sounds relaxing or exhausting. Disney planning goes better when you choose based on behavior, not vacation fantasy.

    Then consider your party makeup. Families with toddlers often need flexibility. Families with tweens and teens may burn through quick-service meals happily and still want snacks. Couples may prefer the standard plan if they see meals as part of the romance and atmosphere. Larger family groups often benefit from having food decisions simplified in advance, especially when budgets differ from one household to another.

    This is where personalized planning really helps. A good advisor can match the plan to your resort stay, park strategy, reservation goals, and budget instead of just quoting the package and hoping it fits.

    Is the Disney dining plan worth it?

    Sometimes yes. Sometimes no. That answer is not evasive – it is honest.

    If you want convenience, like having major costs prepaid, and know you will use the credits well, a Disney dining plan can absolutely be worth it. If you are casual about meals, prefer spontaneous choices, or are unlikely to use every credit, paying out of pocket may be the smarter move.

    The most successful Disney trips usually come from choosing the plan that supports your style instead of forcing your style to fit the plan. That is especially true for busy families and milestone trips where the goal is less stress, not more spreadsheet work.

    If you want your vacation to feel organized without feeling rigid, take the time to compare how you actually travel. The right answer is the one that lets you enjoy Disney with confidence – and spend less time worrying about every meal once you arrive.

K&S The Travel Crusaders uses Accessibility Checker to monitor our website's accessibility.